How I Create Custom Watercolor Wedding Maps (From First Idea to Final Keepsake)
Every custom watercolor wedding map I create starts with a story.
Not just a location. Not just a venue.
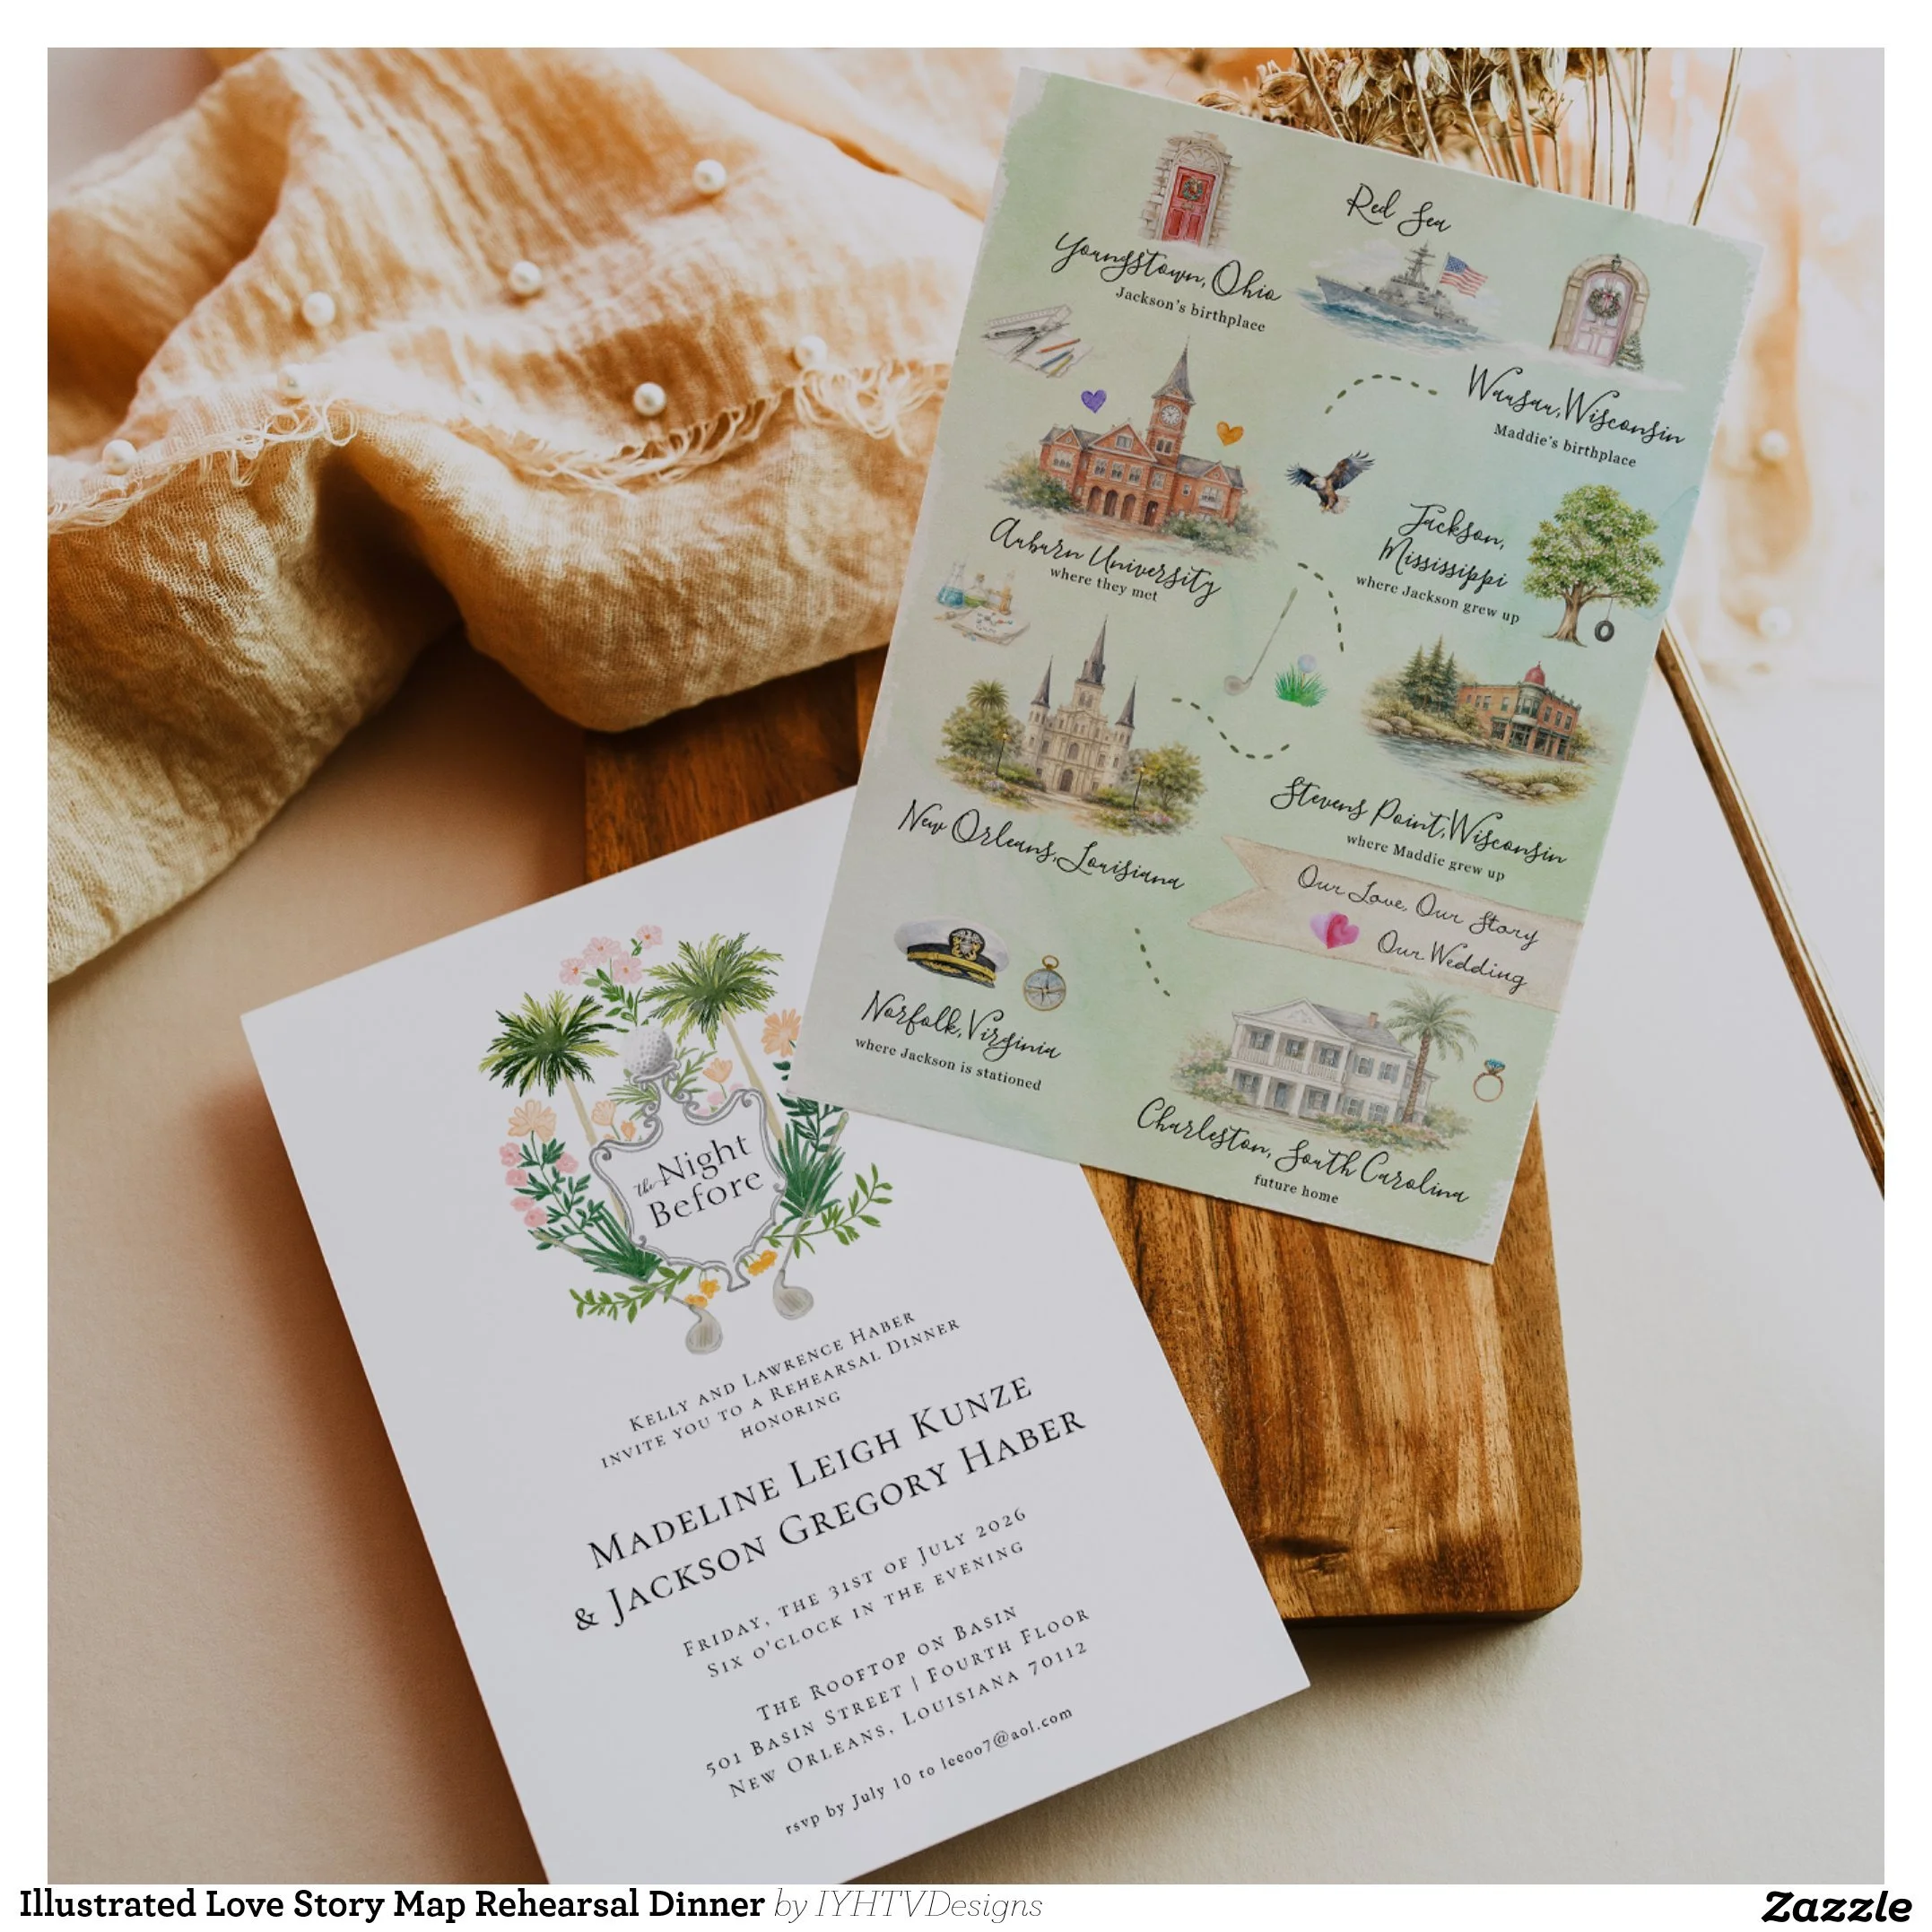
A story about how two people found each other, where they have been, what matters to them, and how they want their guests to experience their wedding weekend.
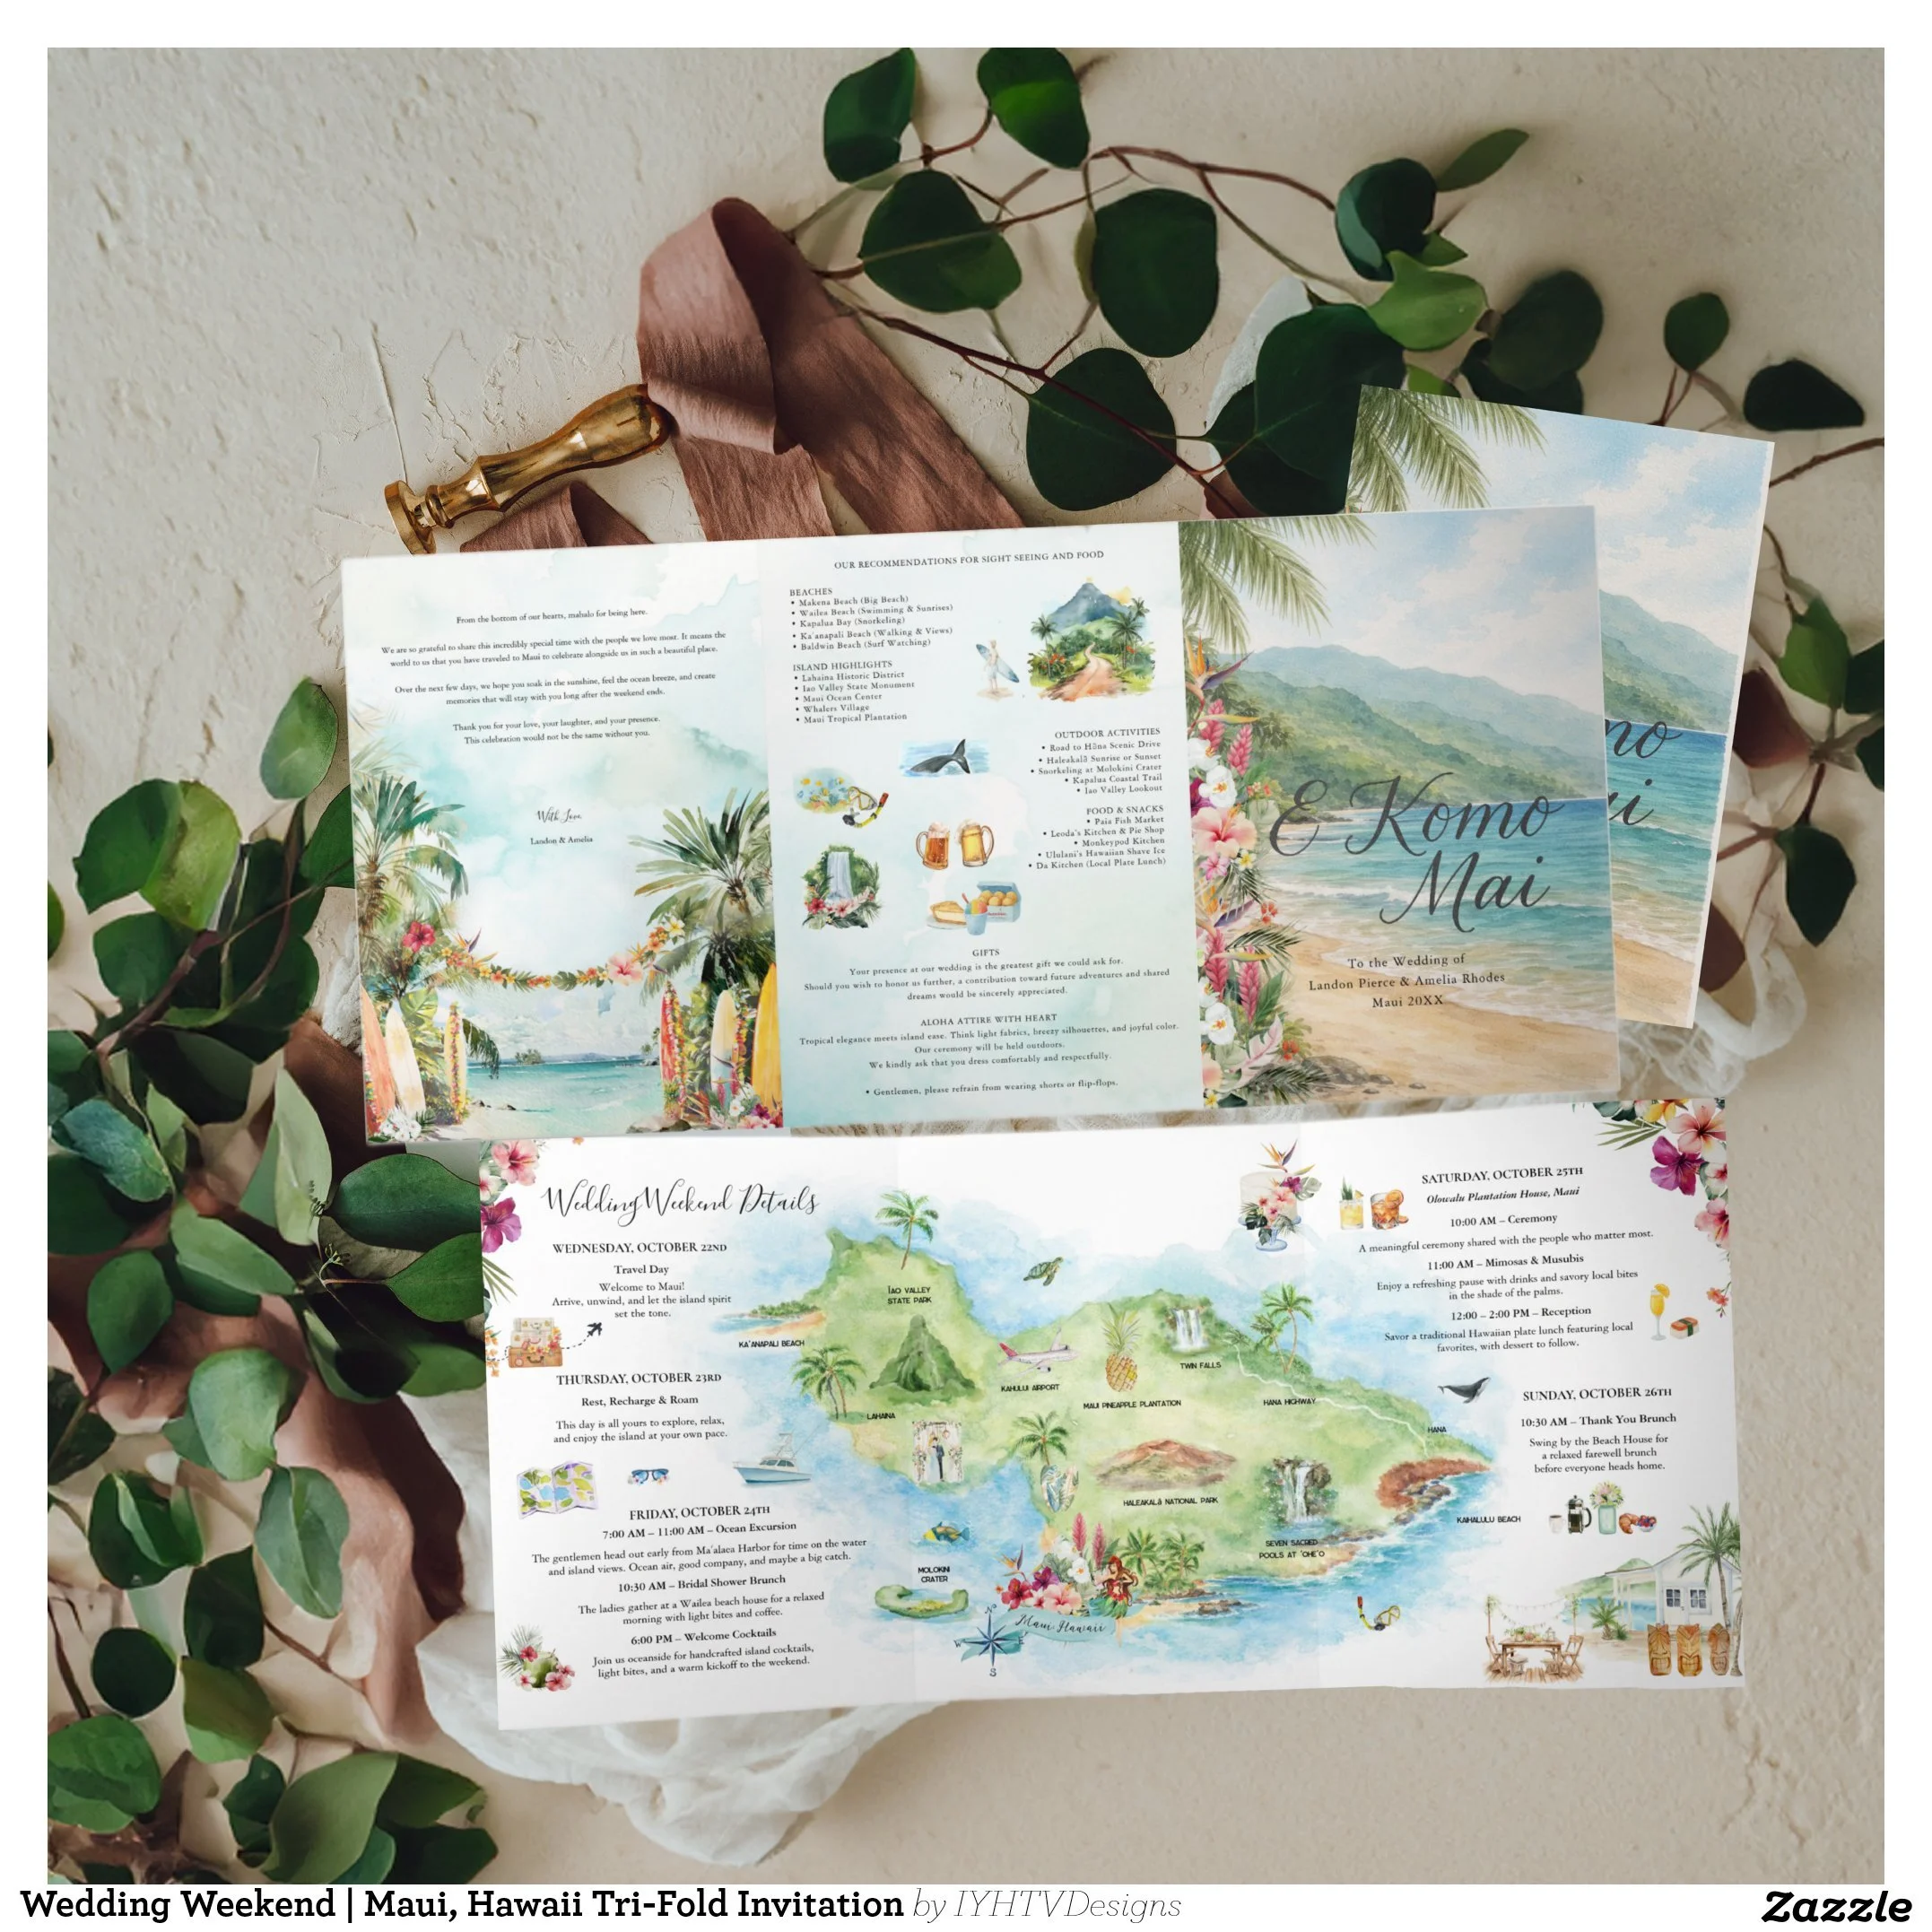
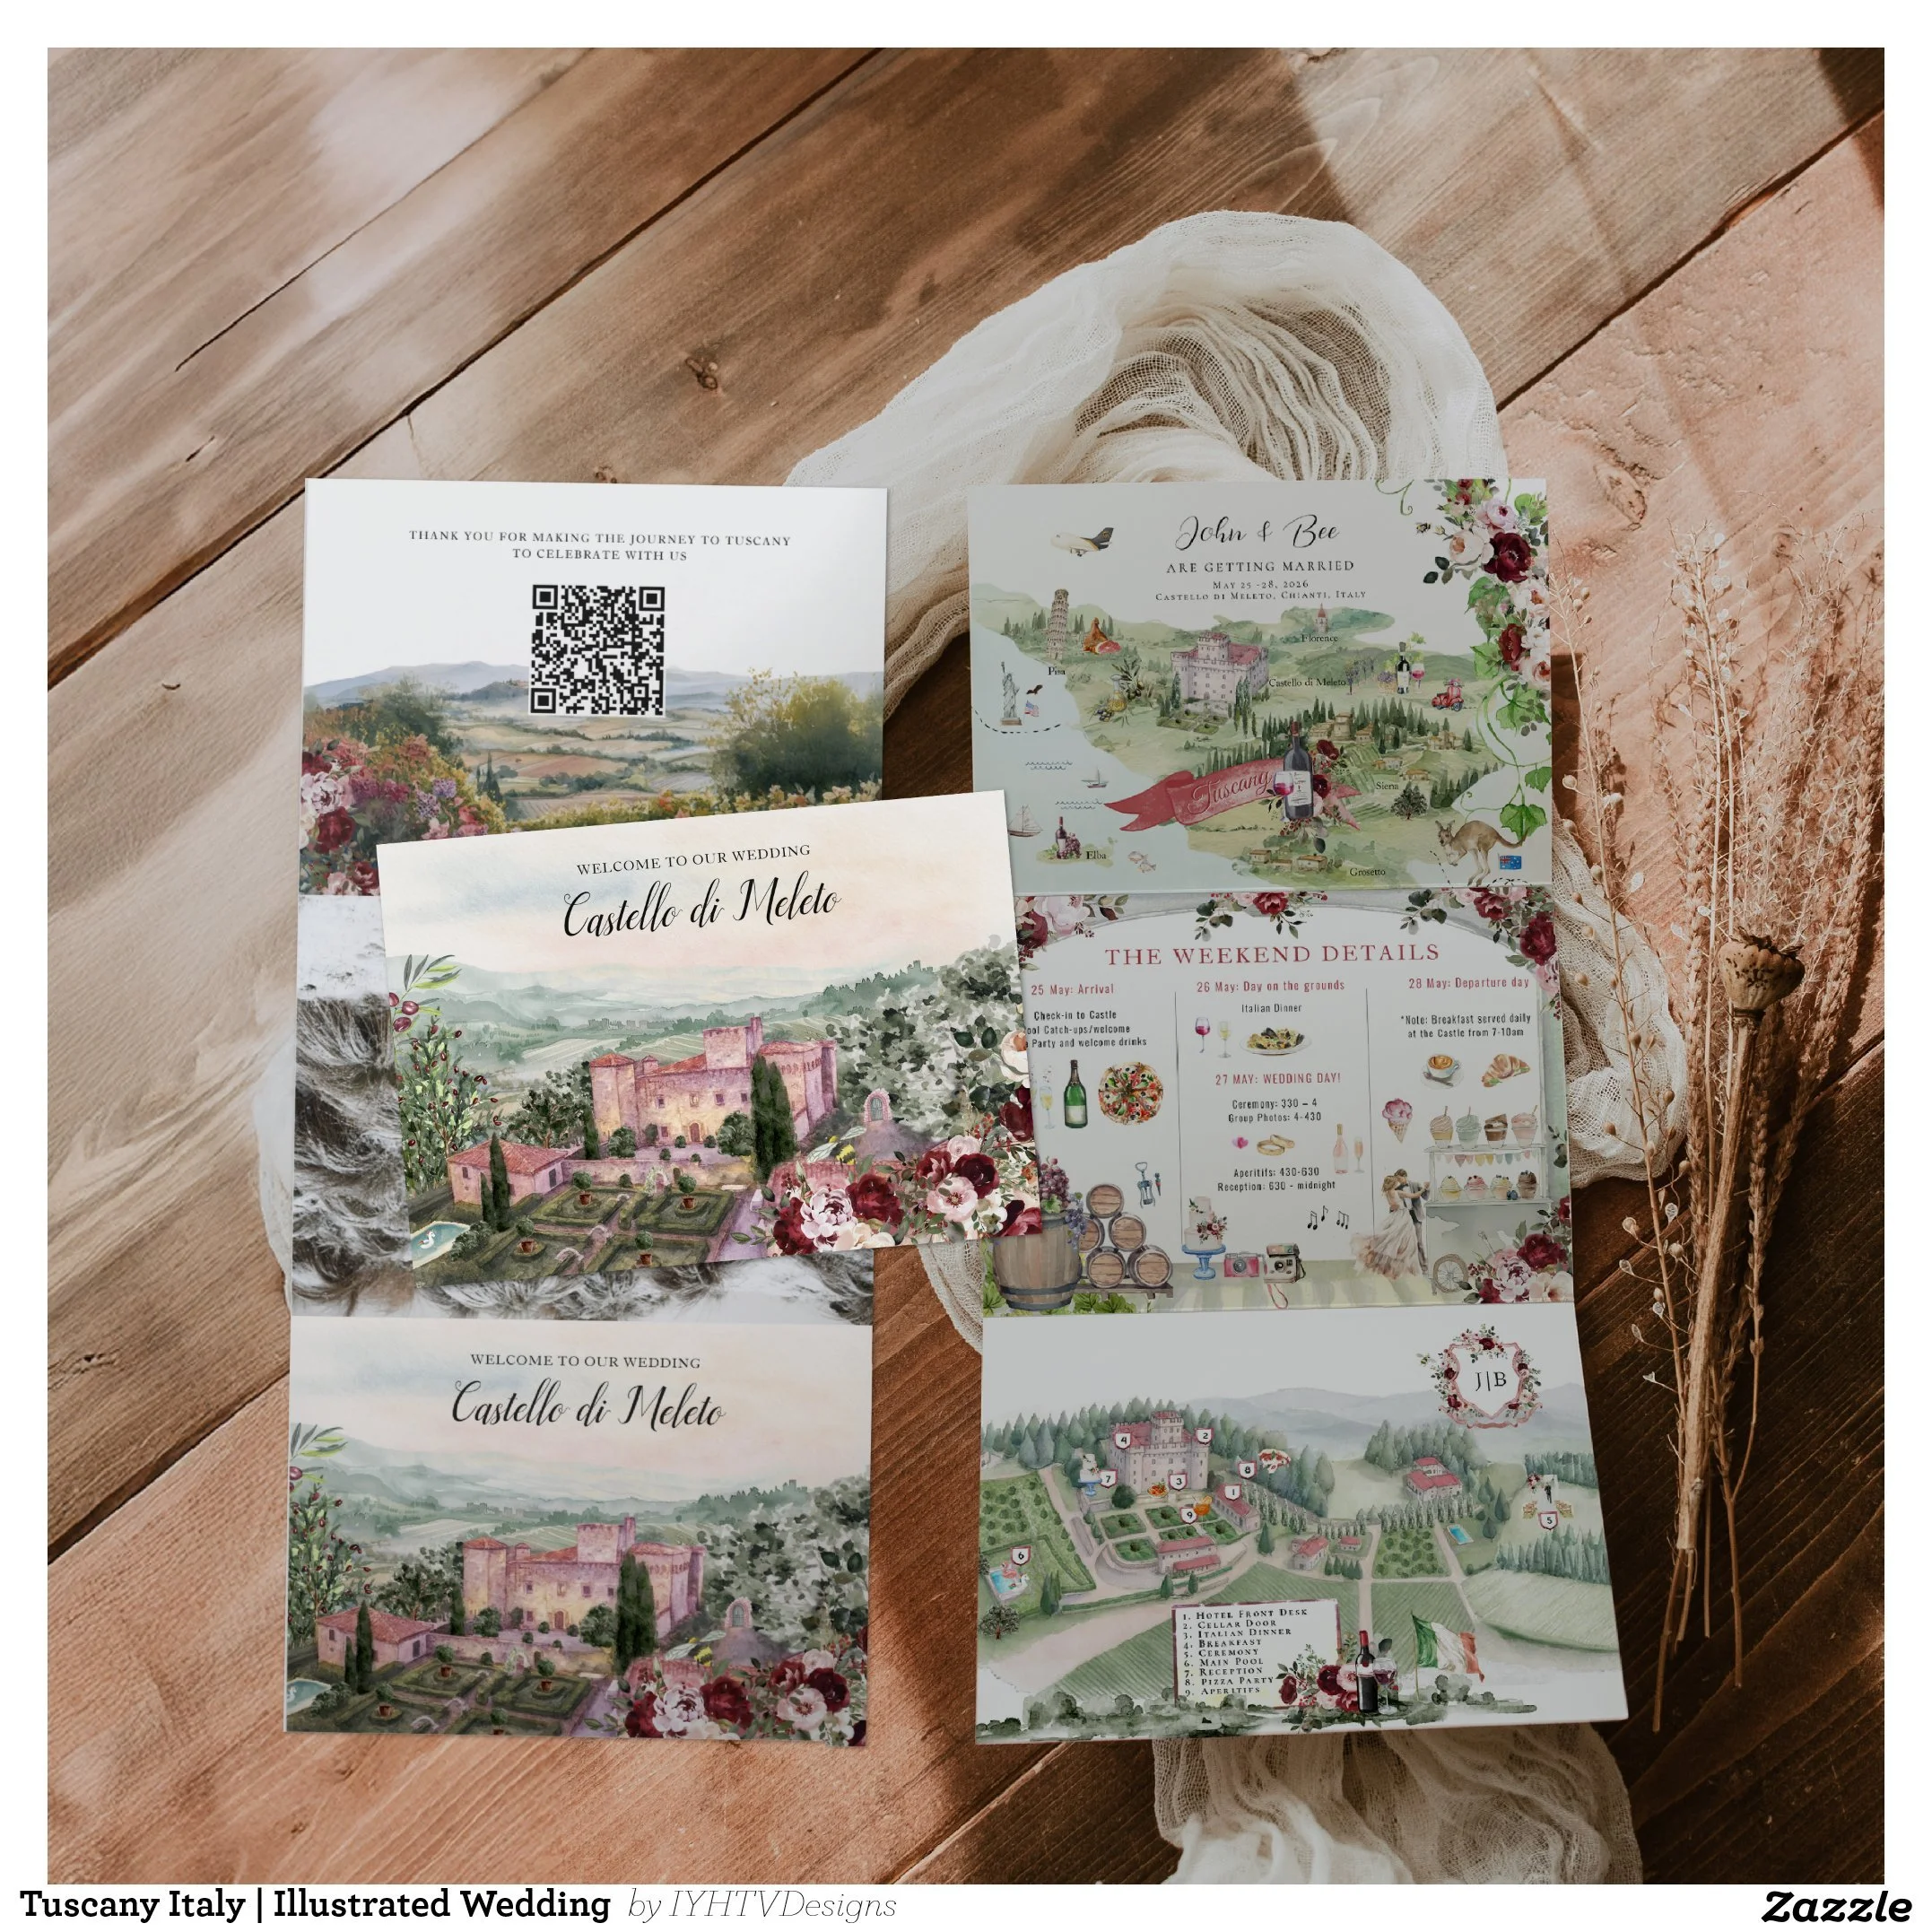
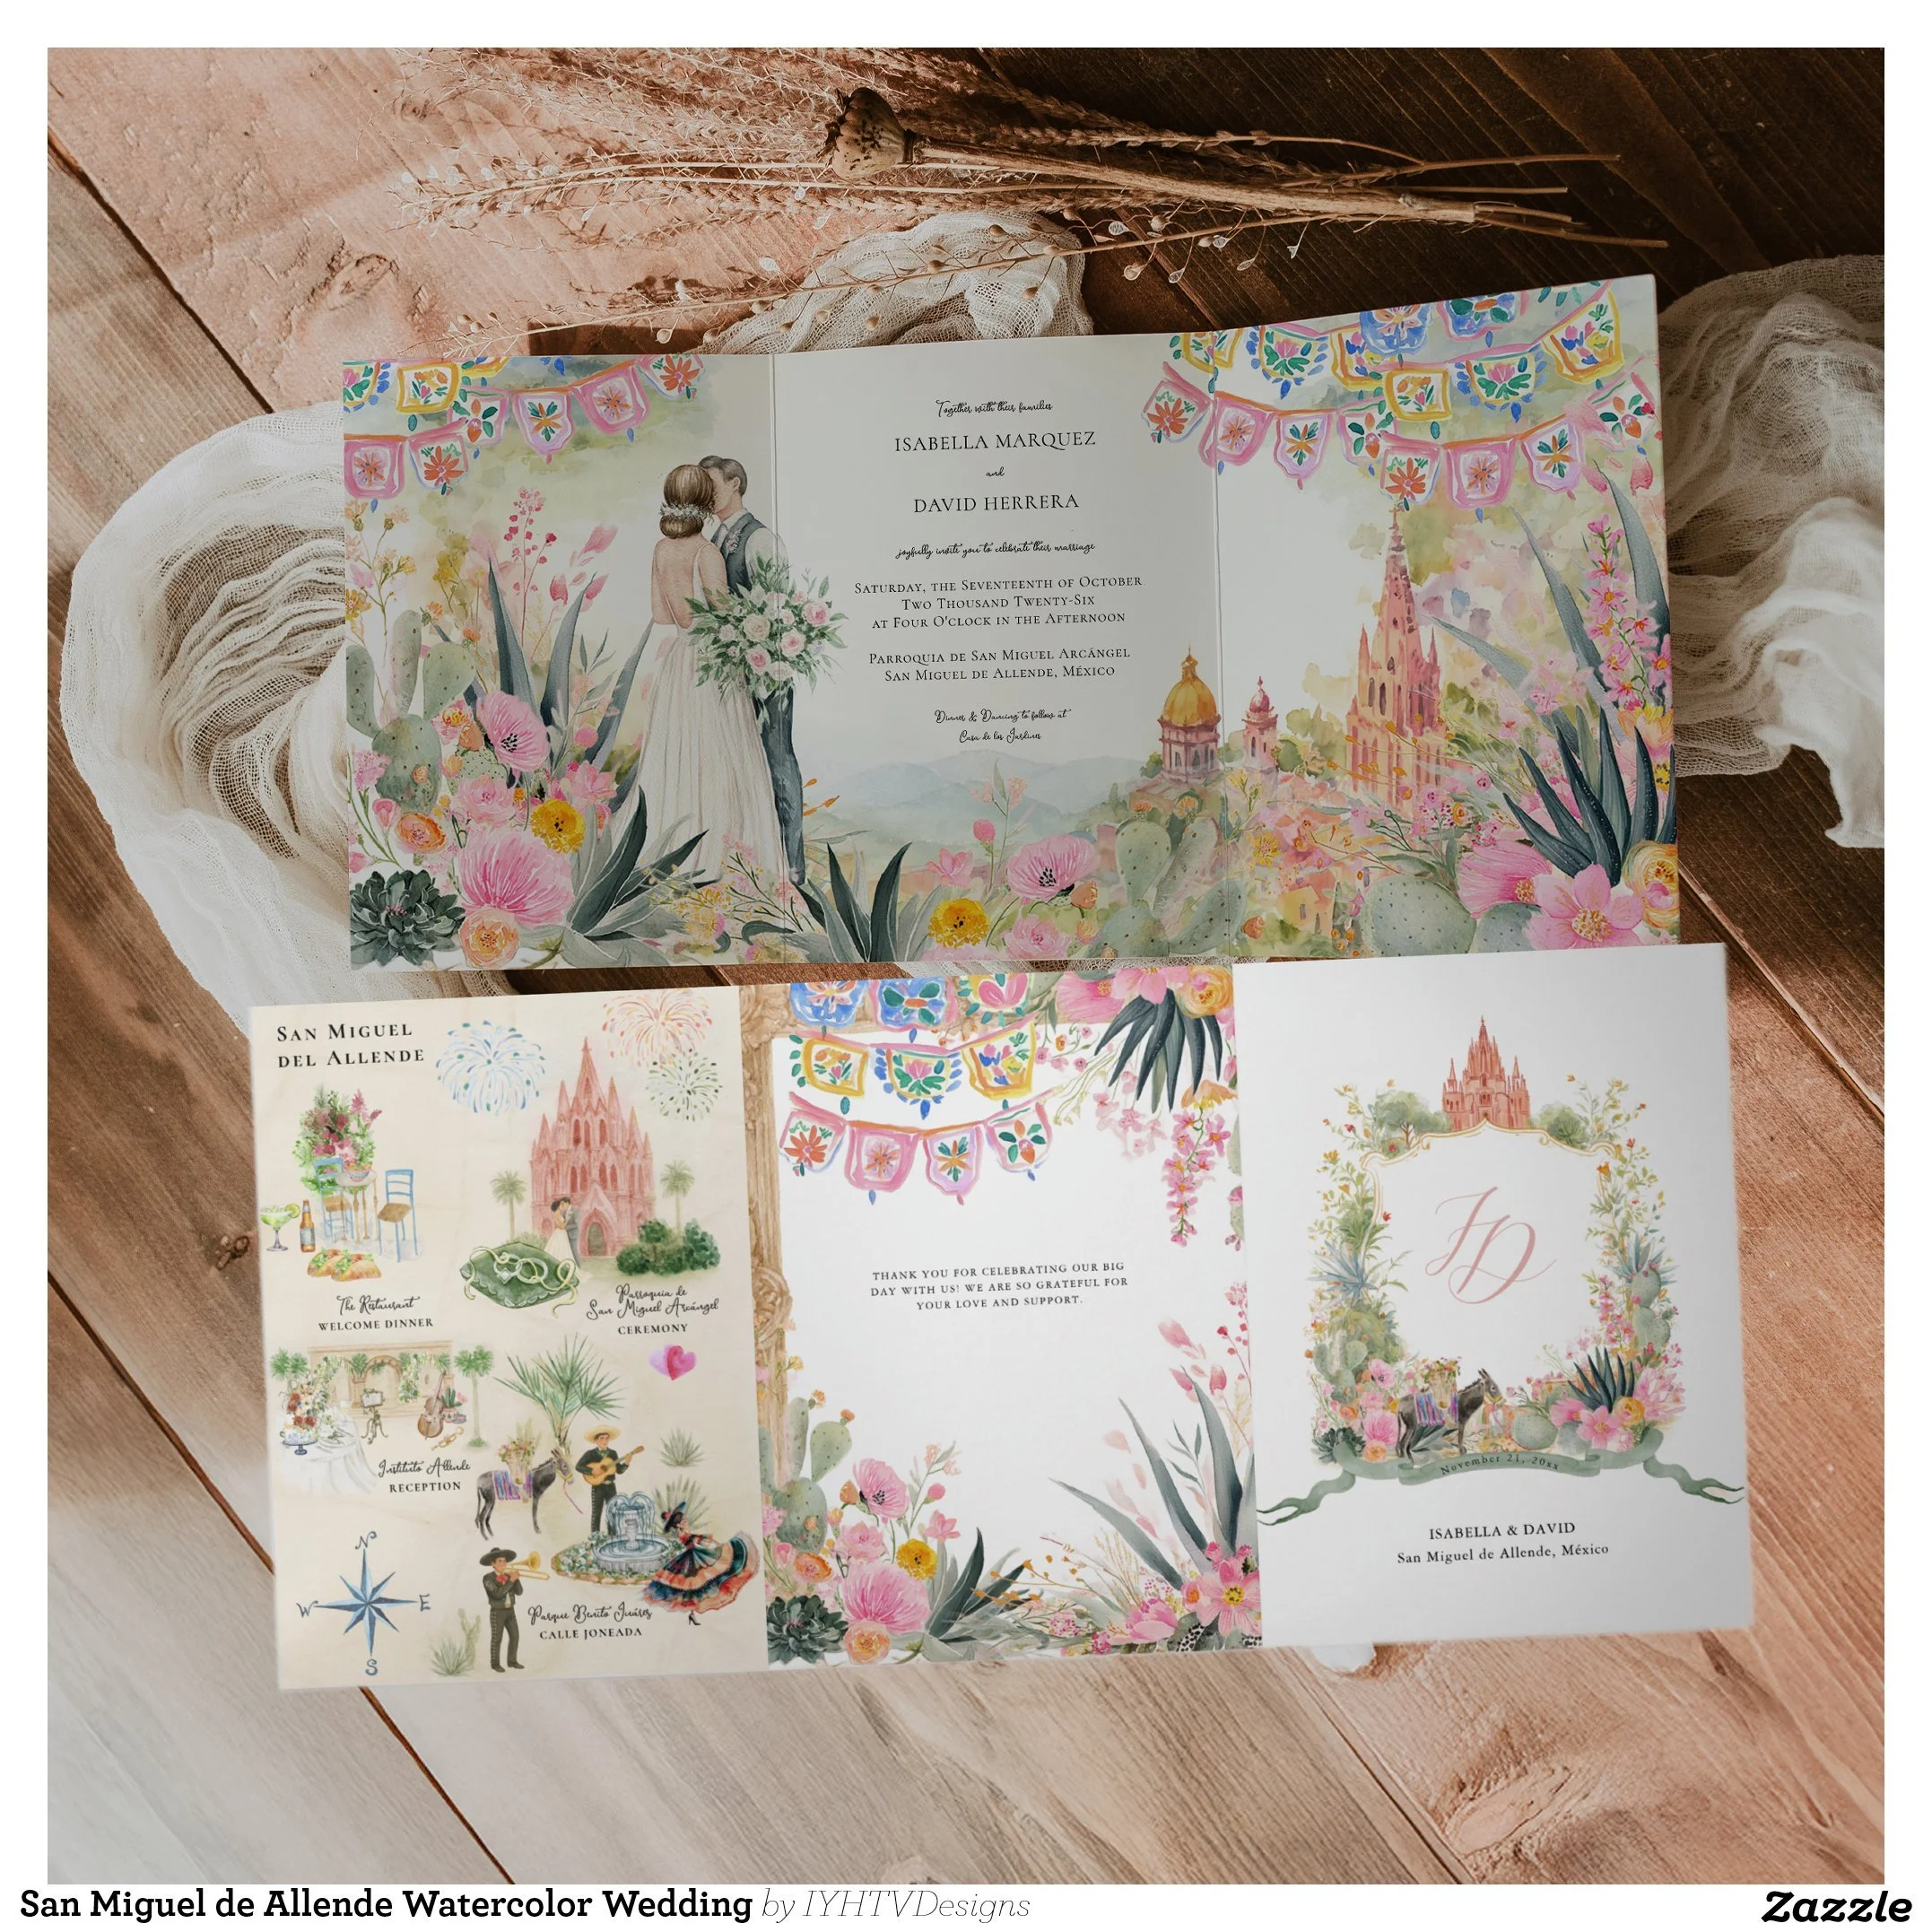
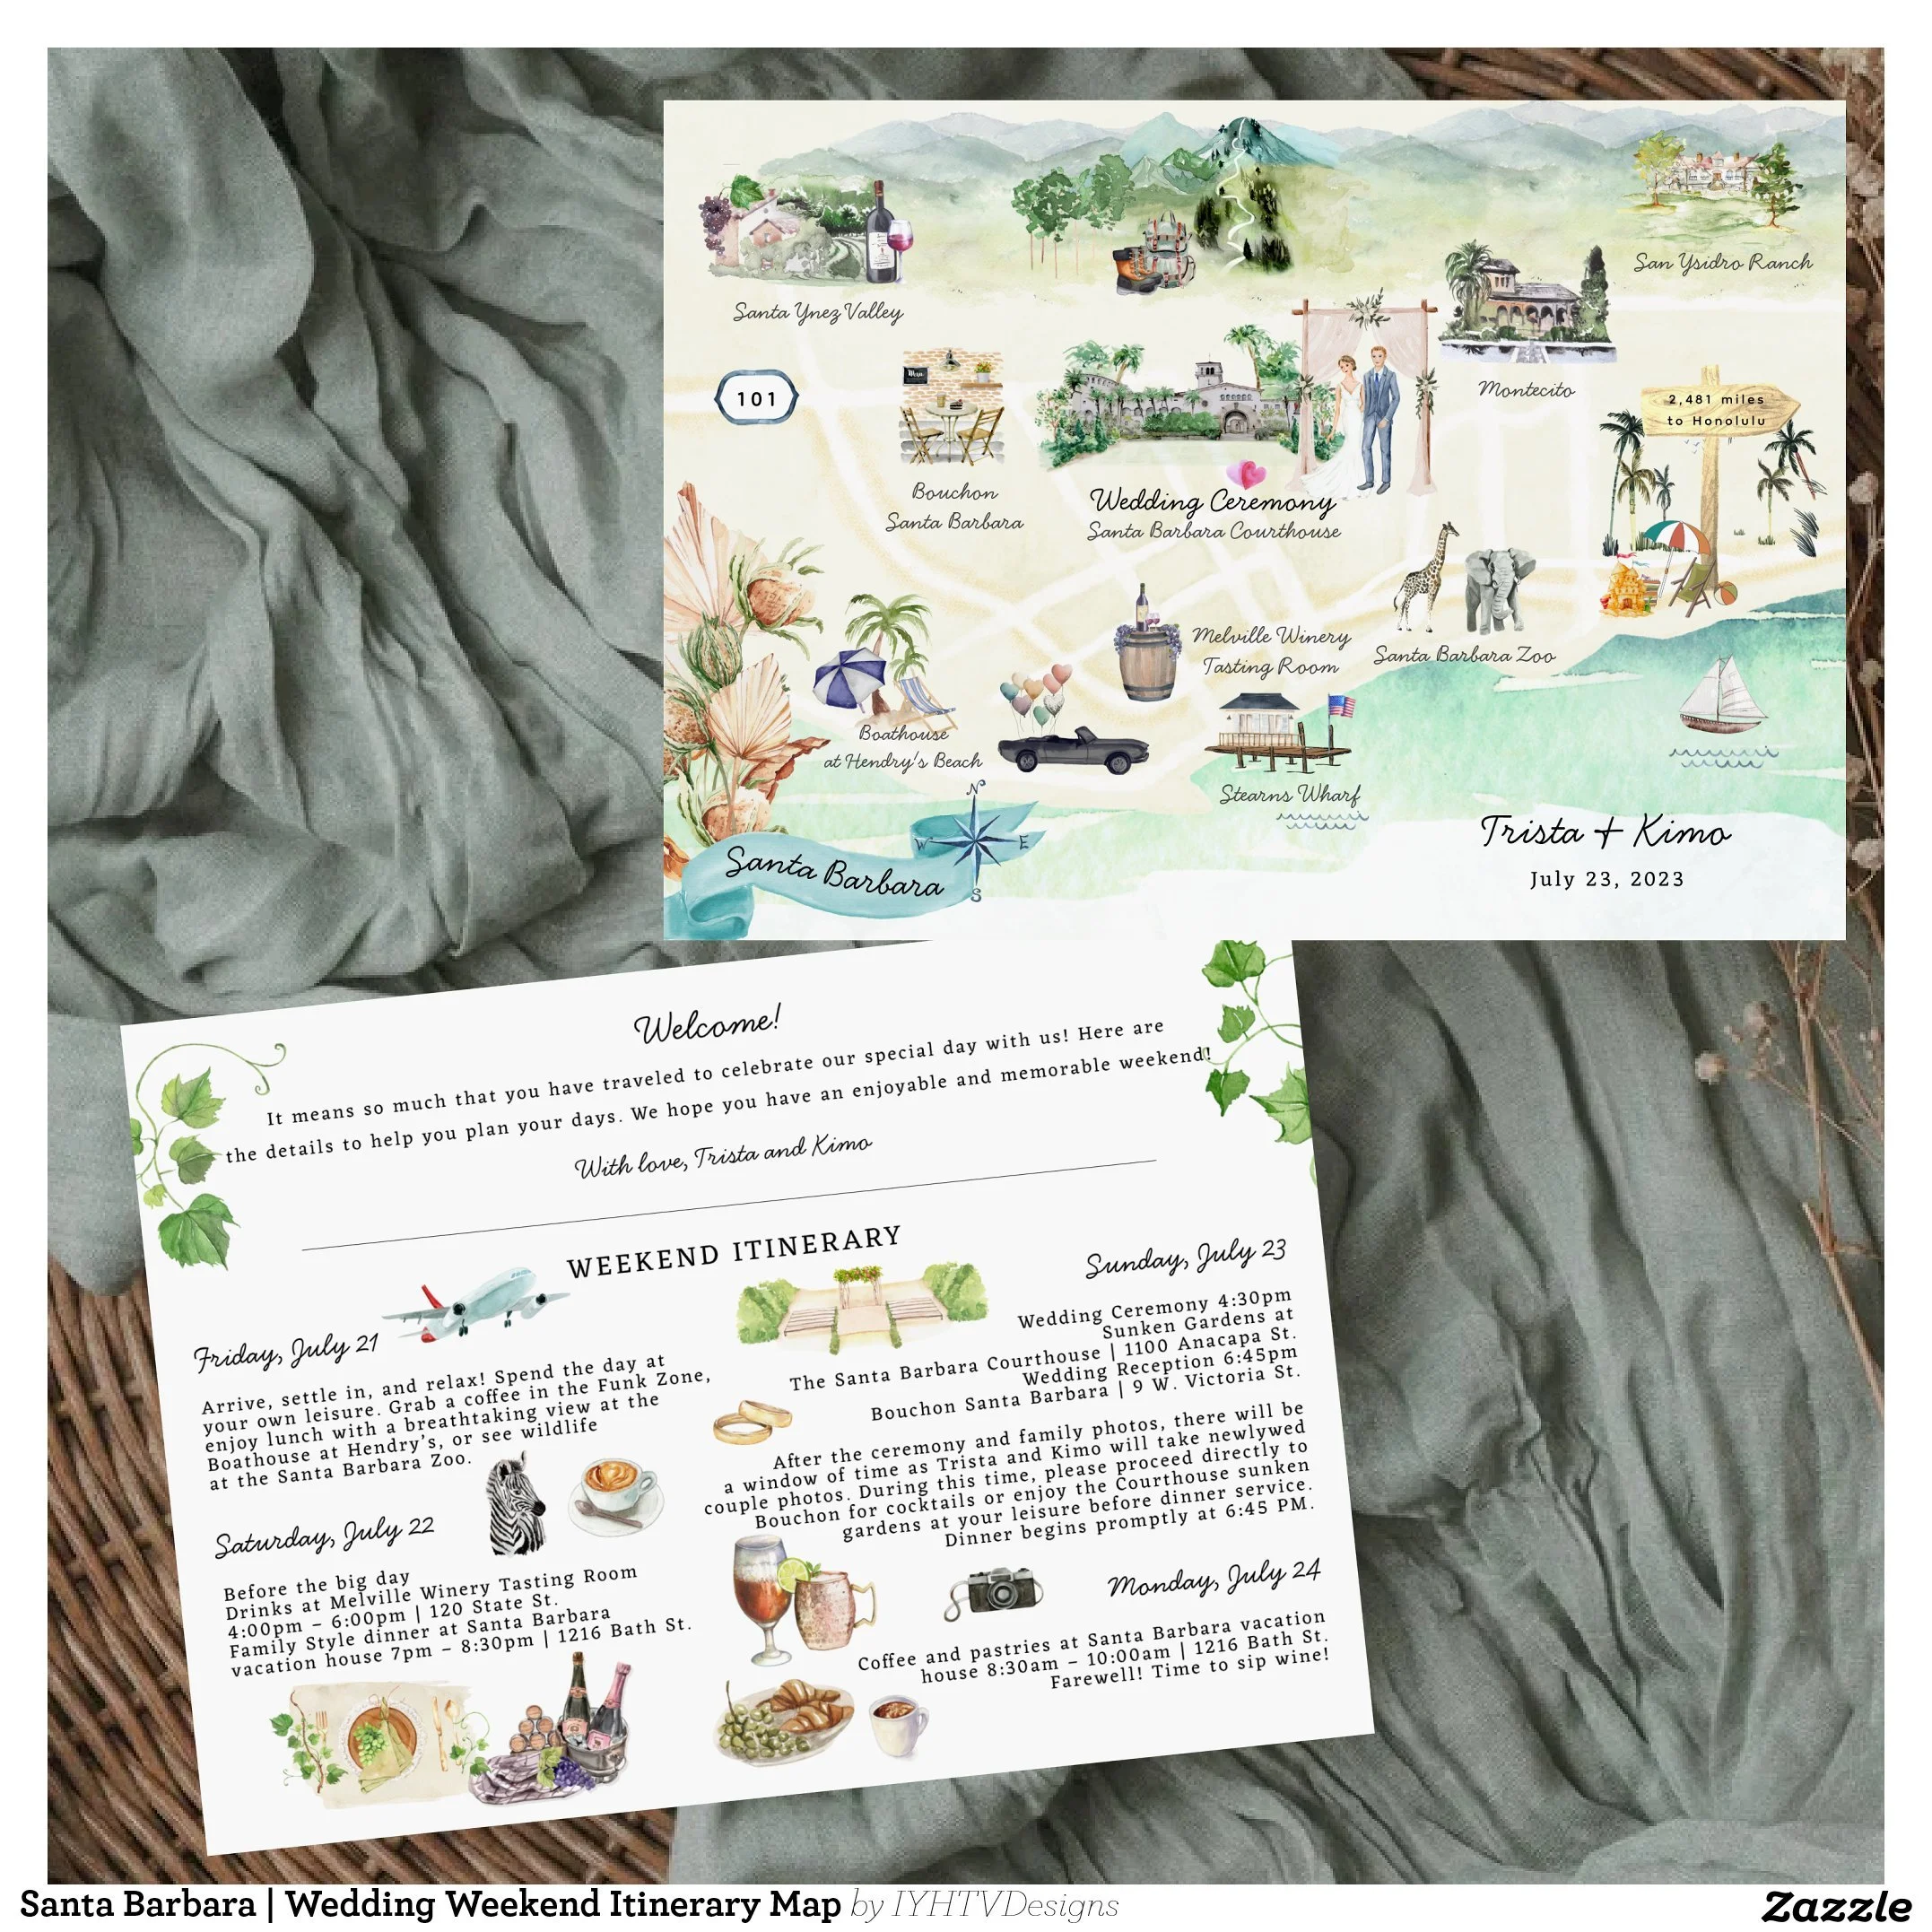
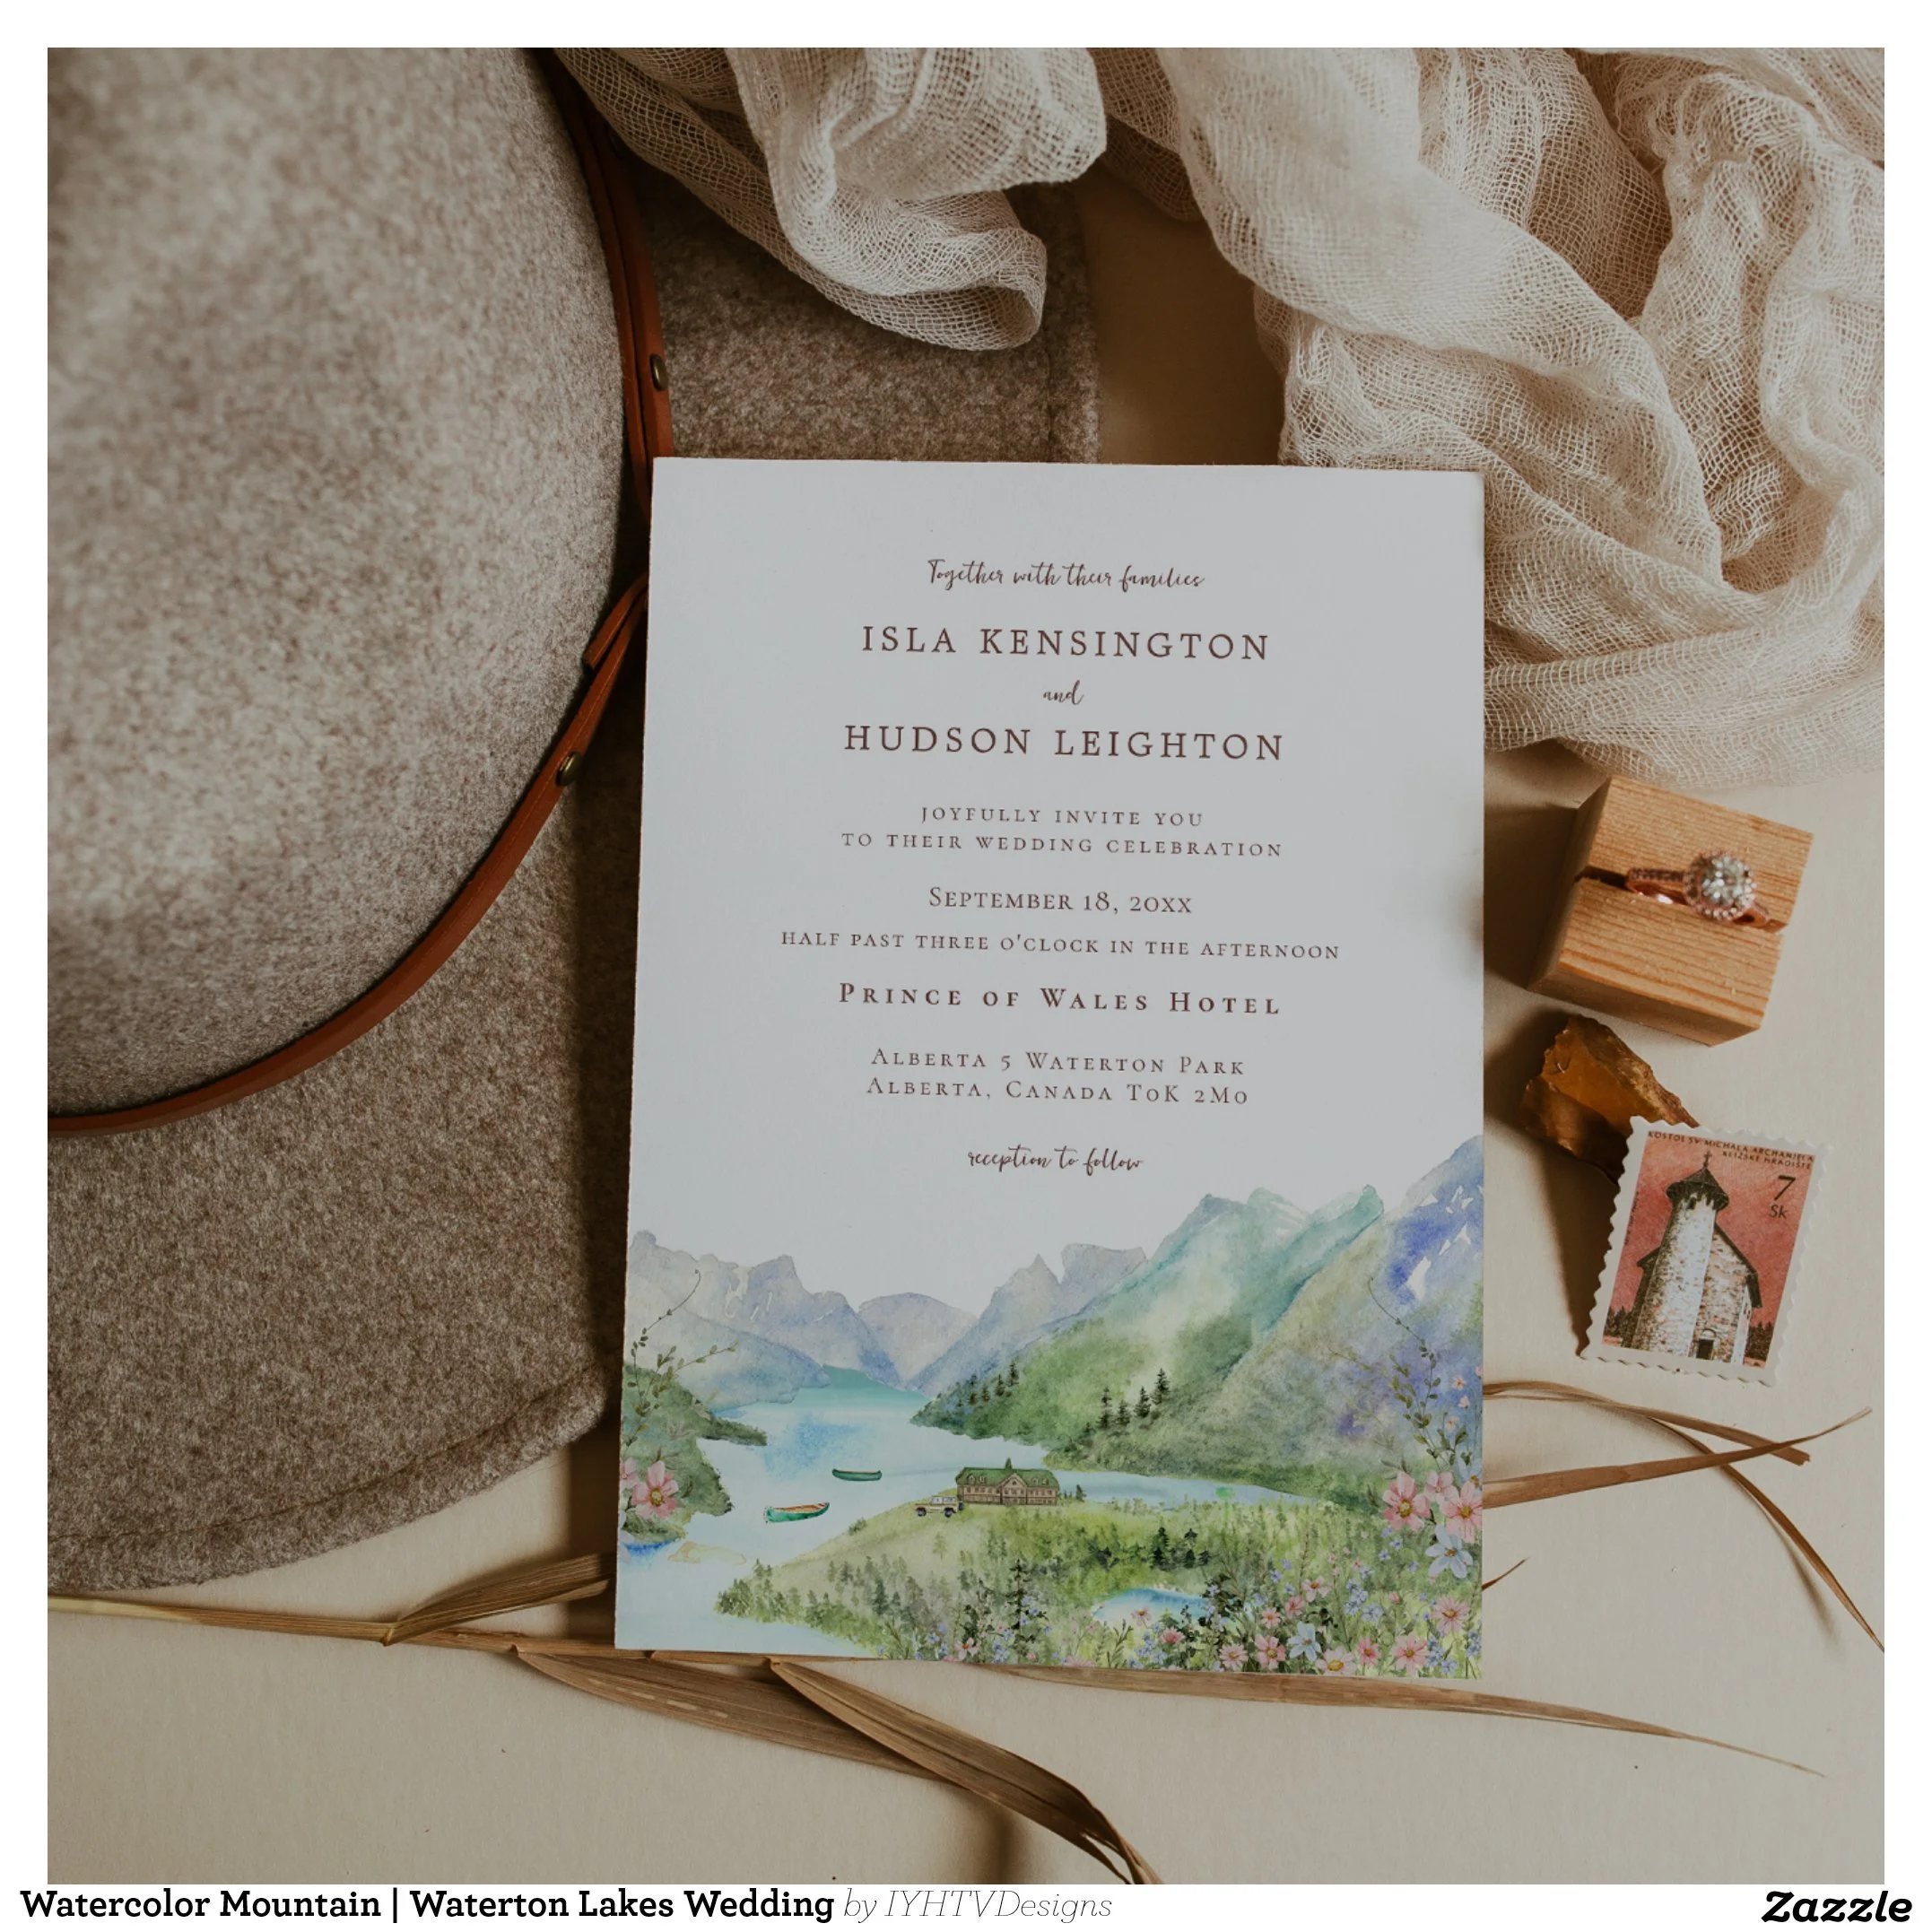
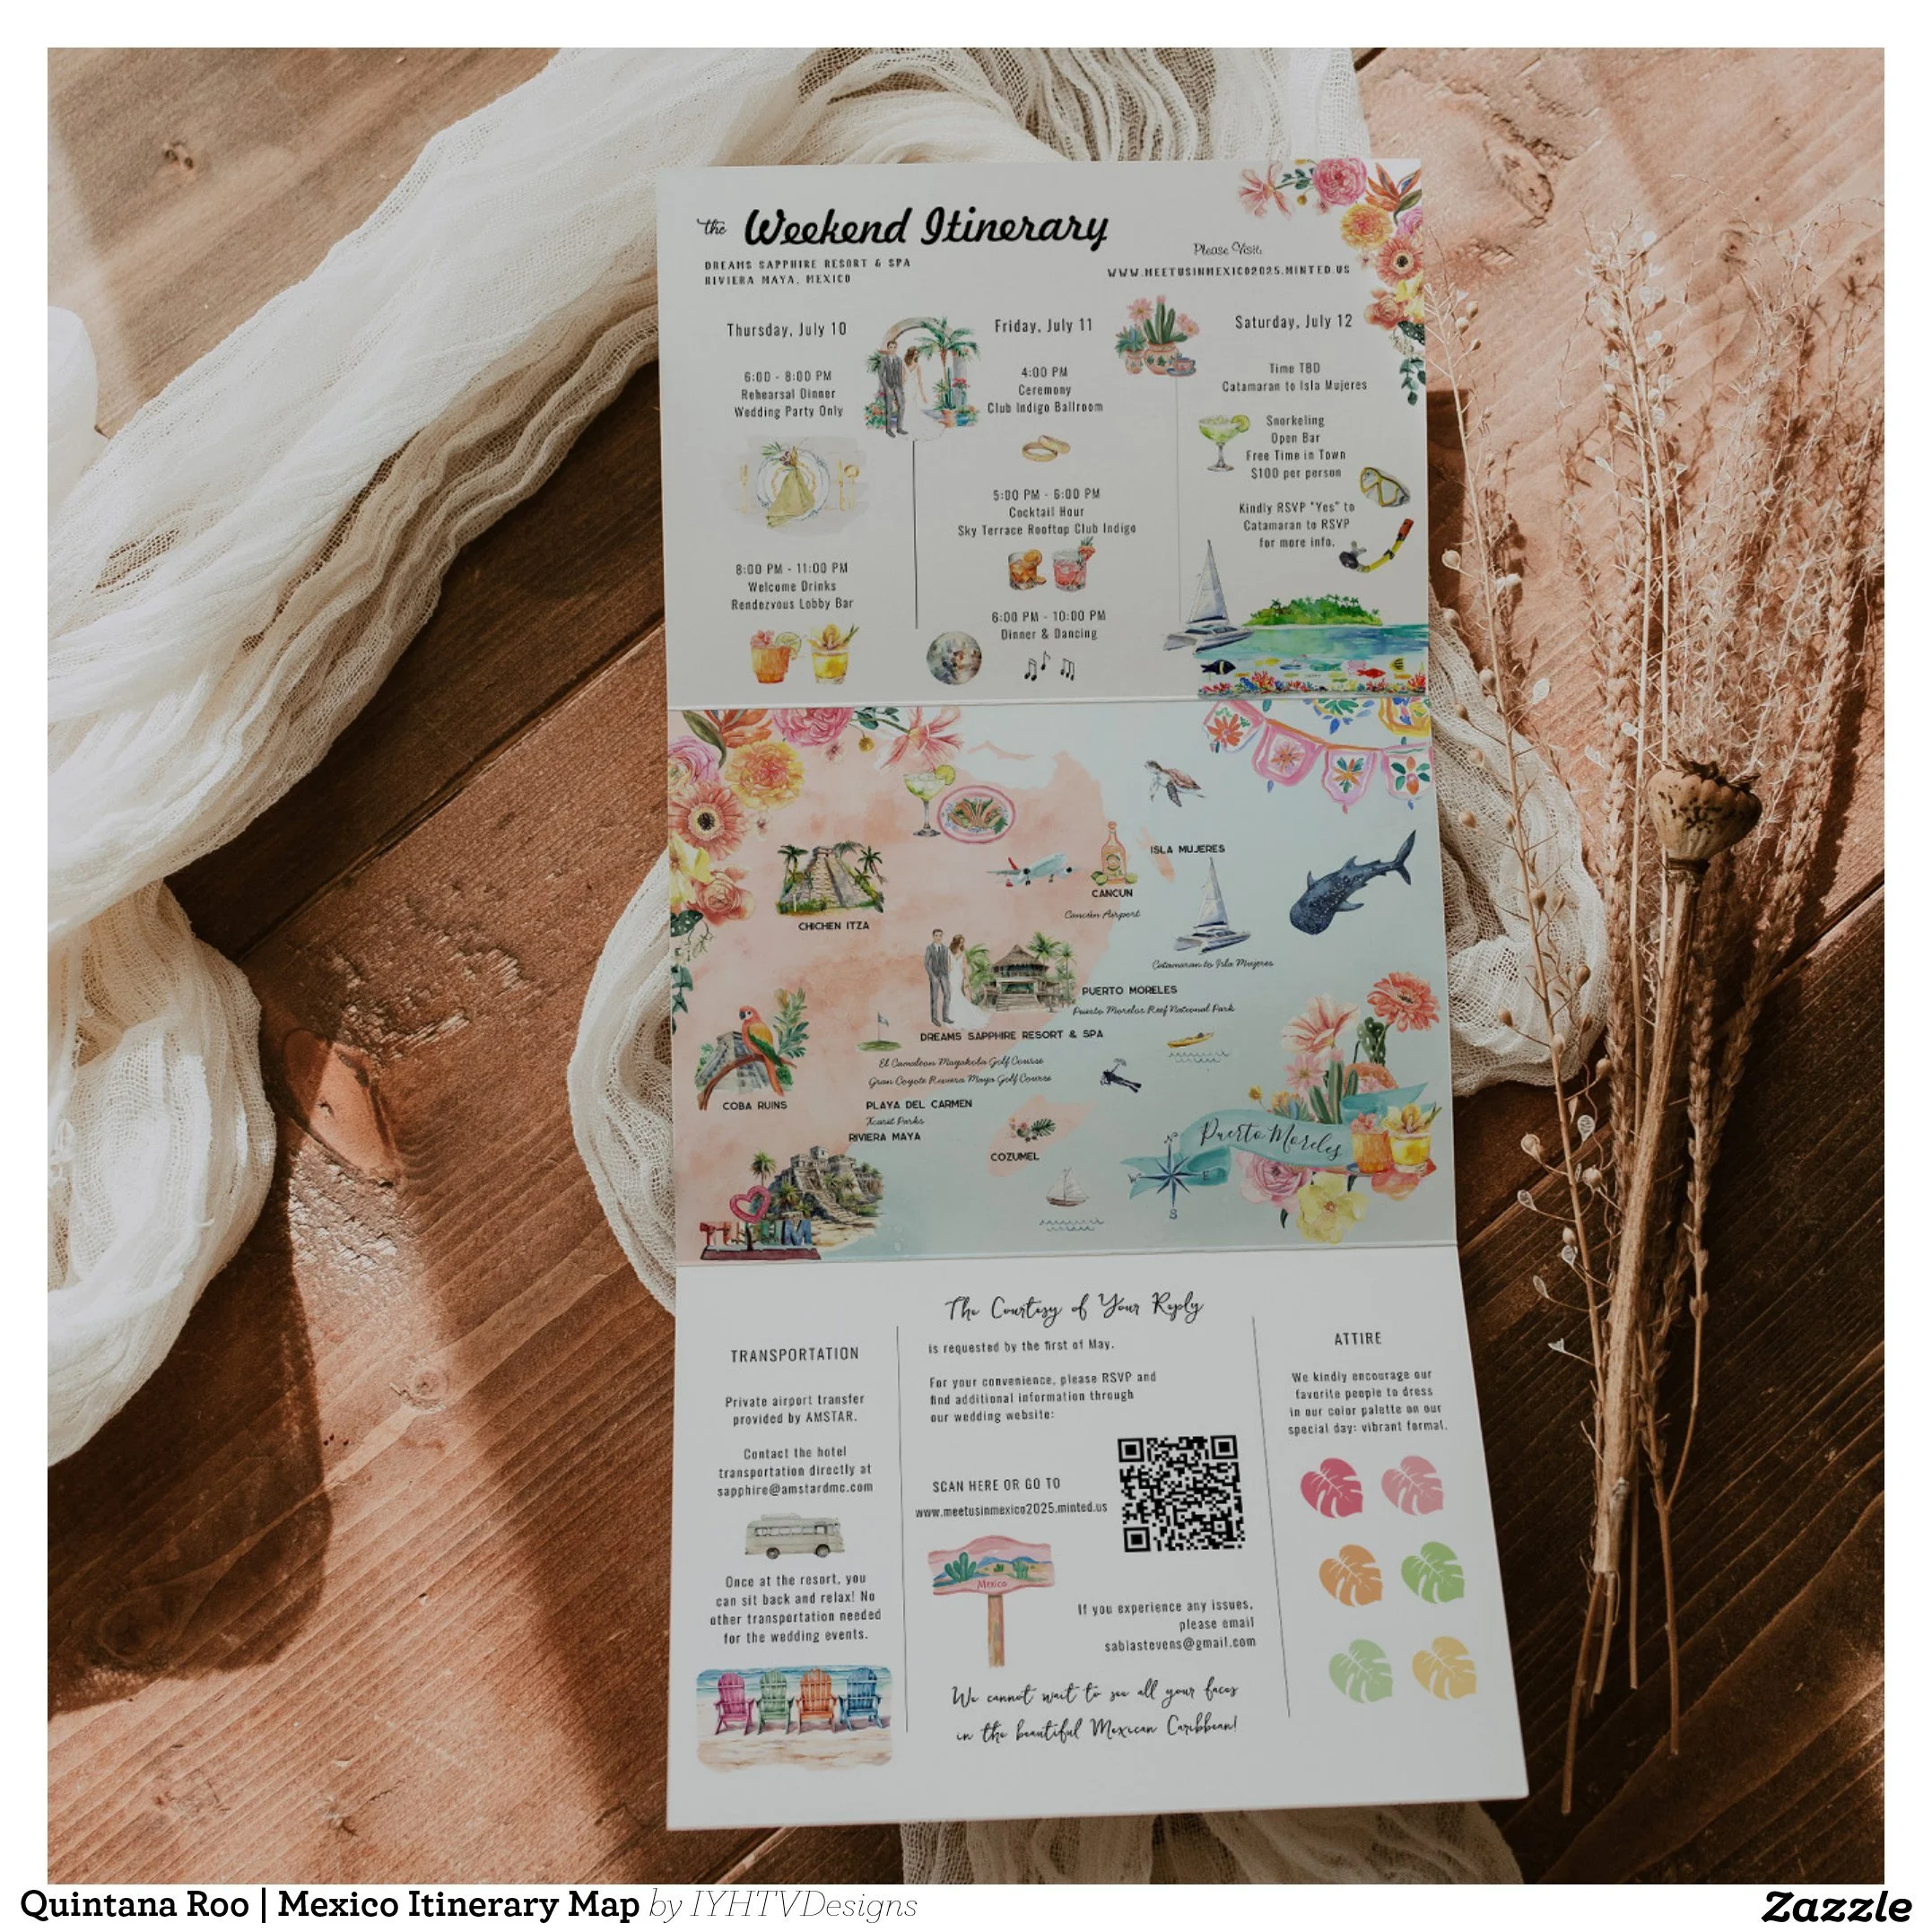
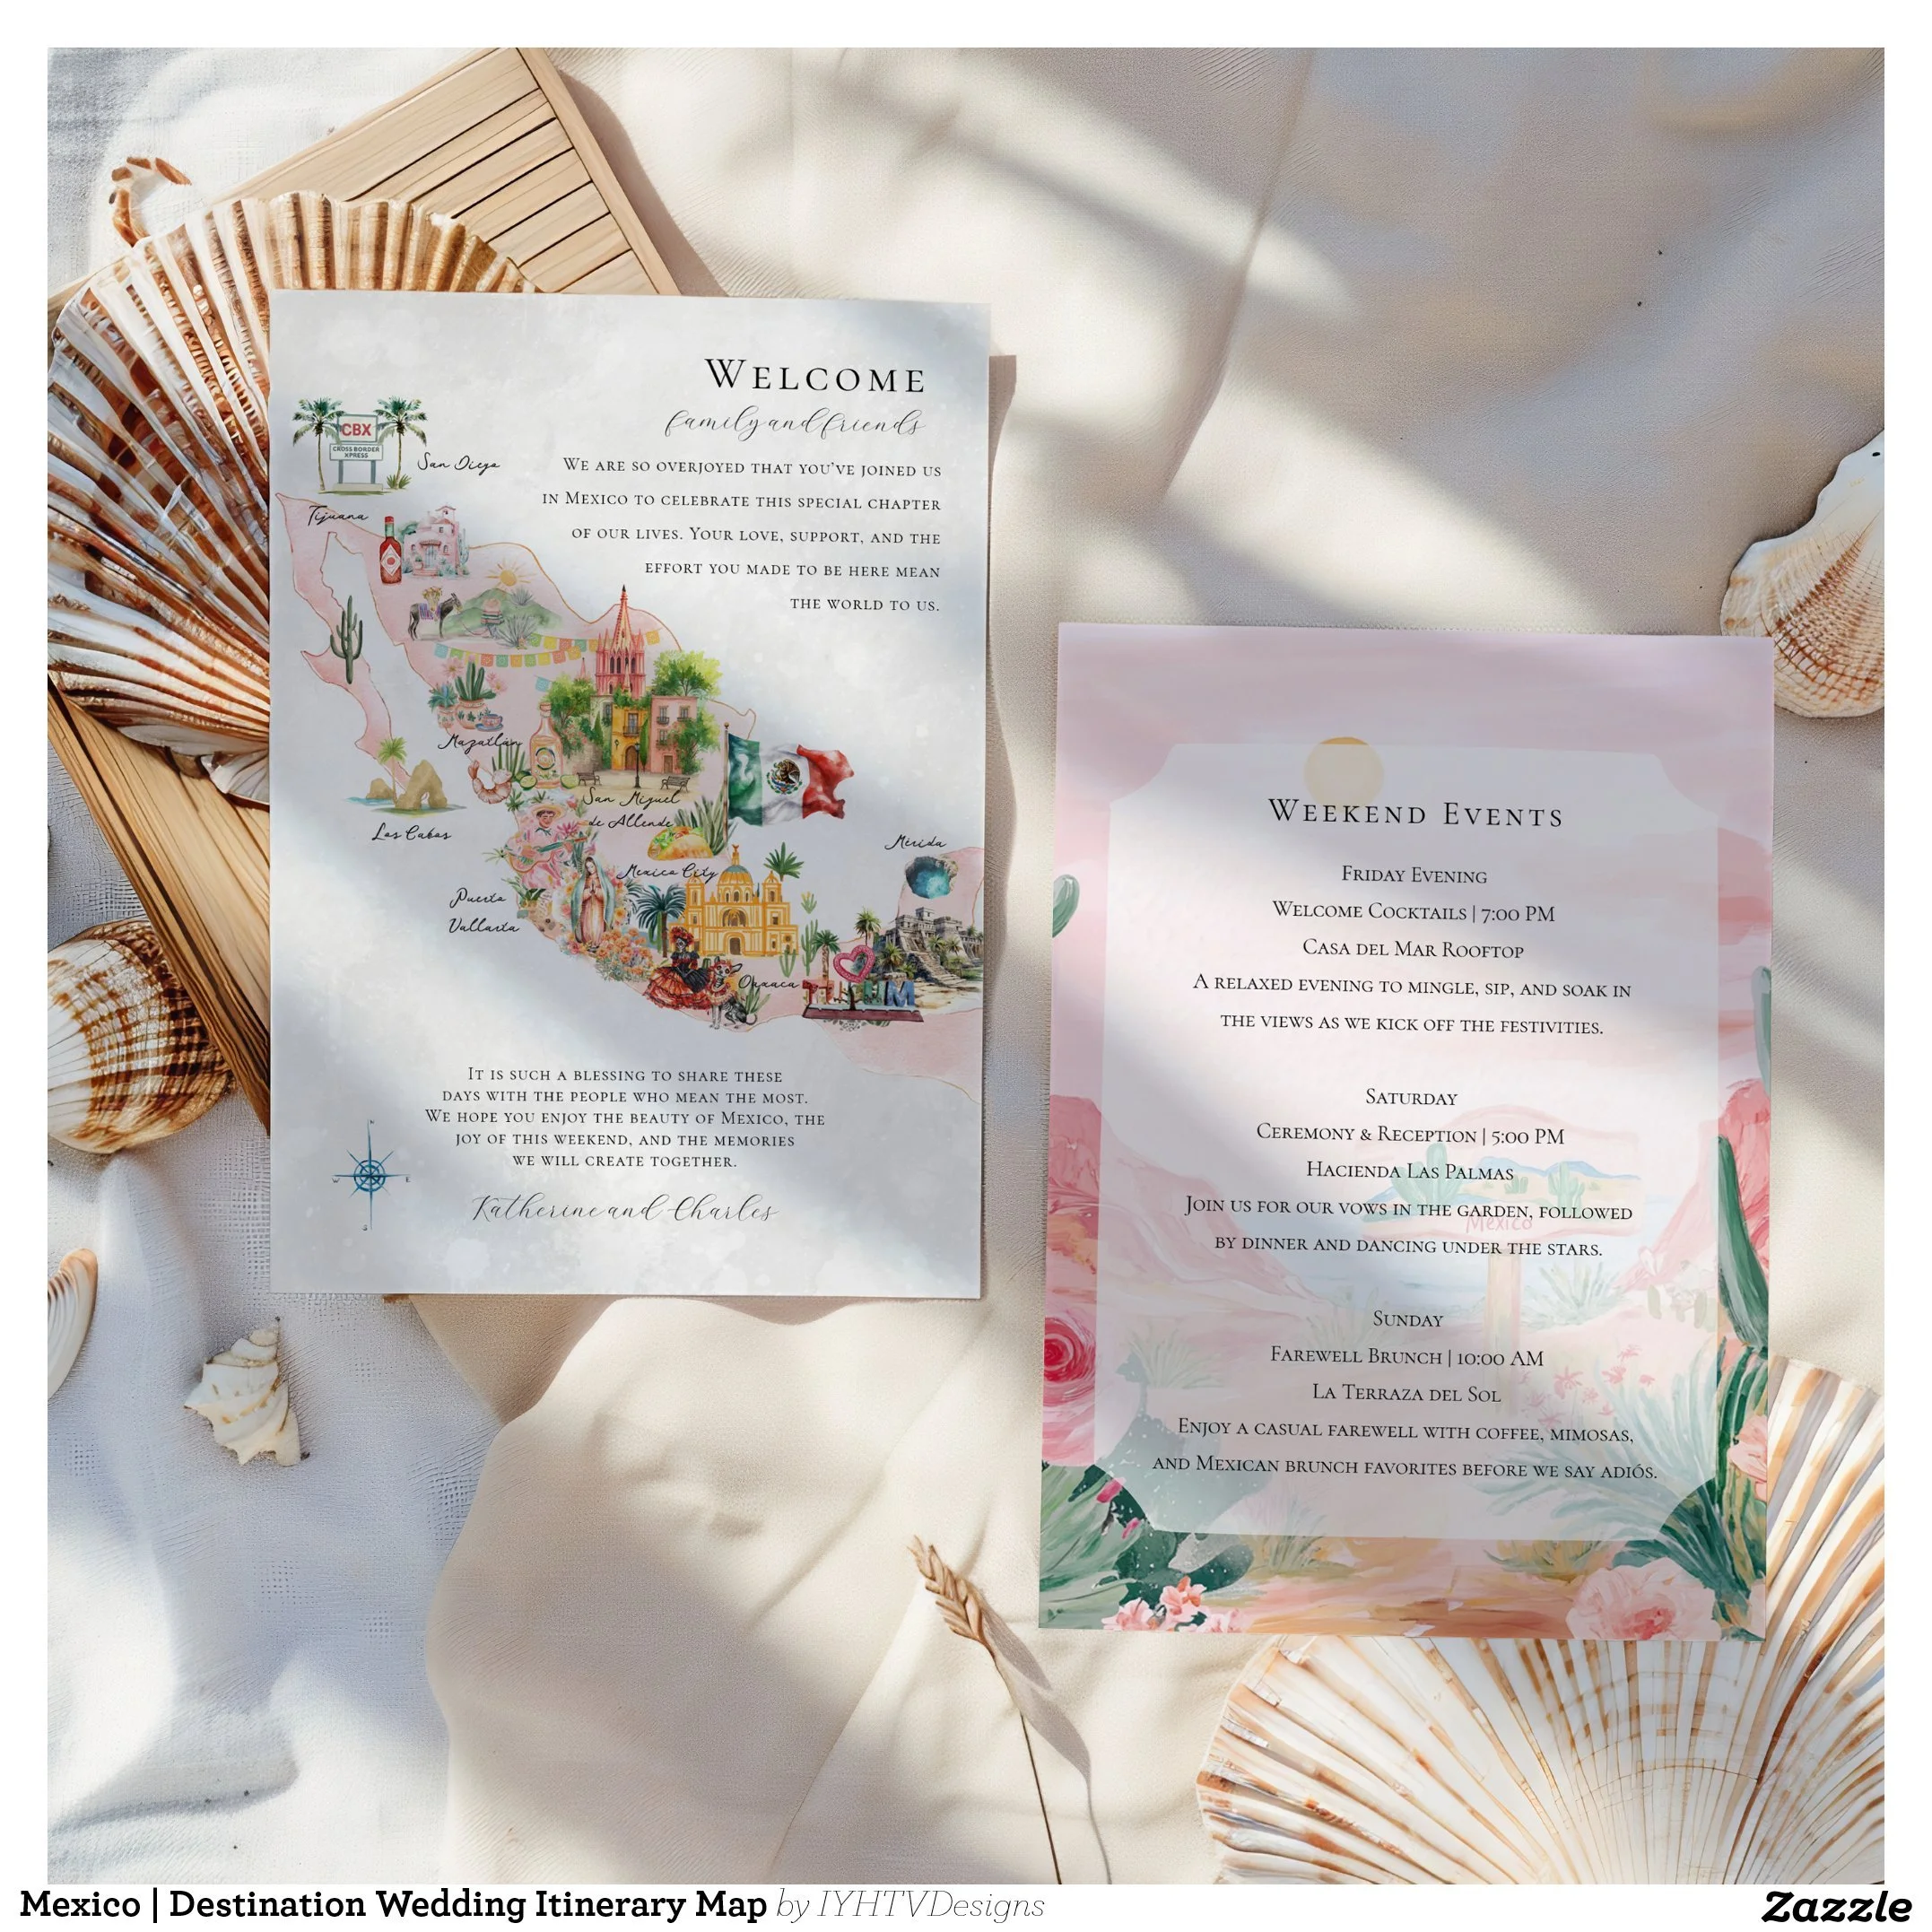
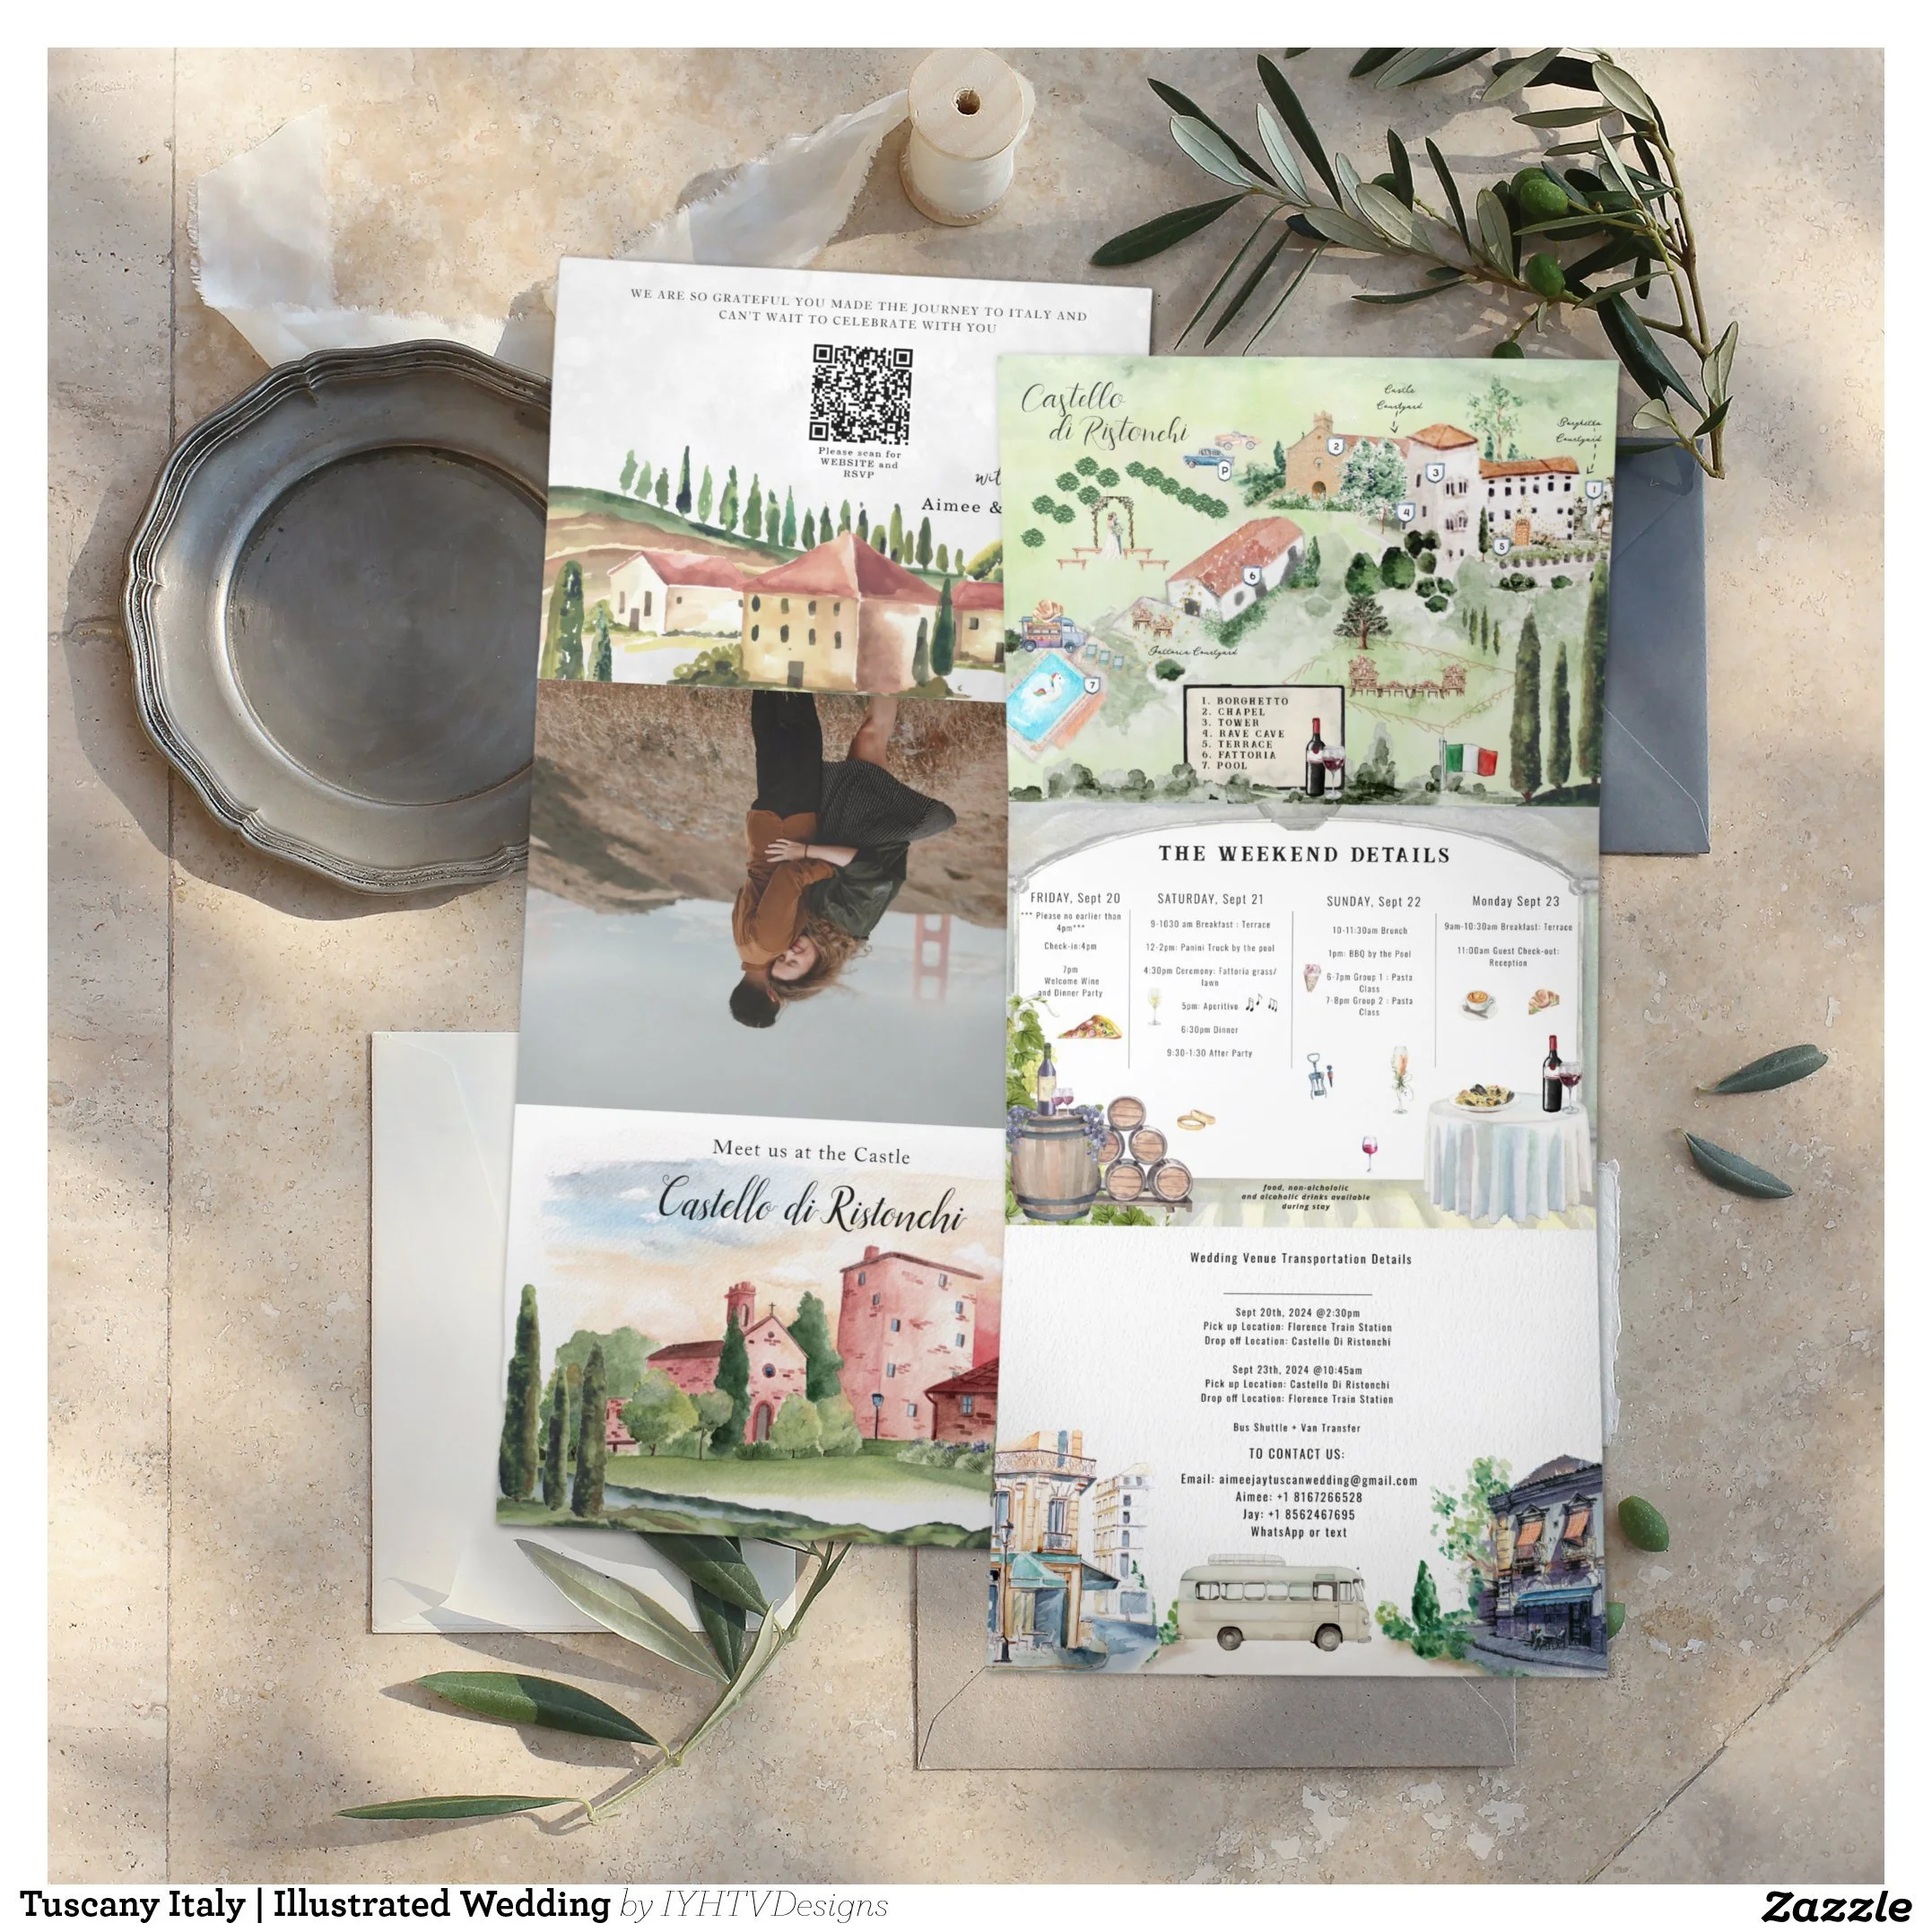
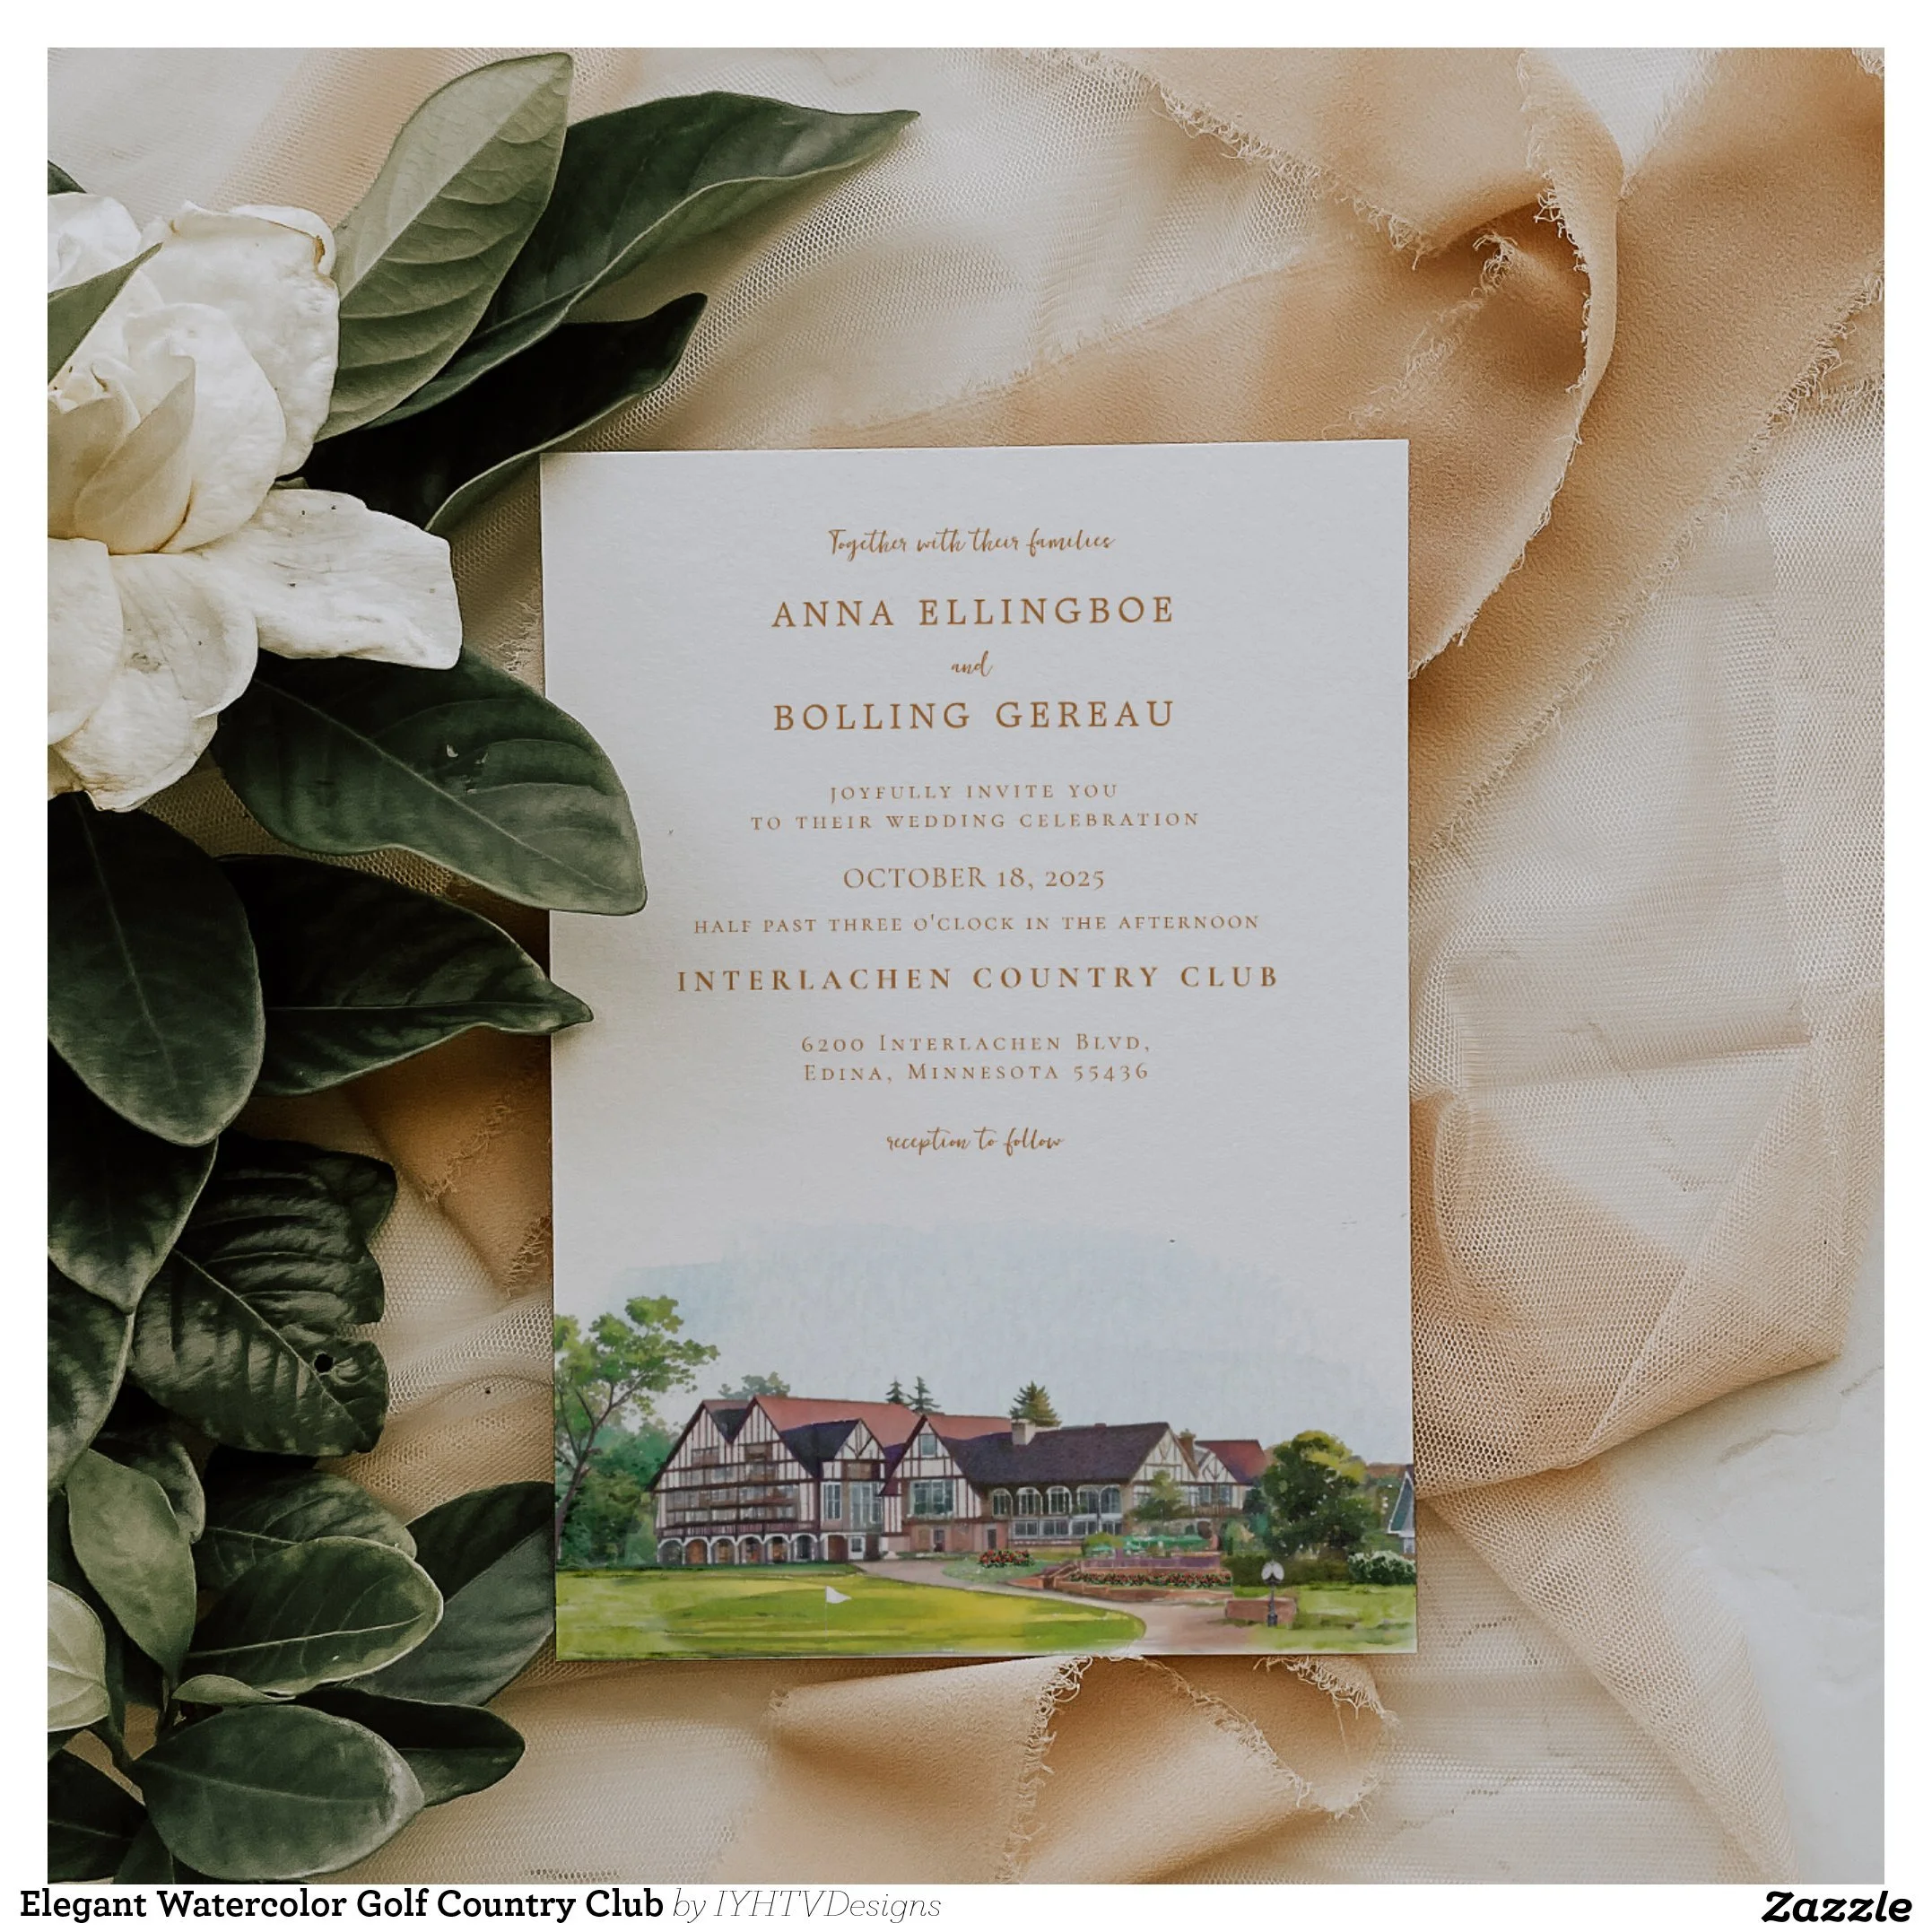
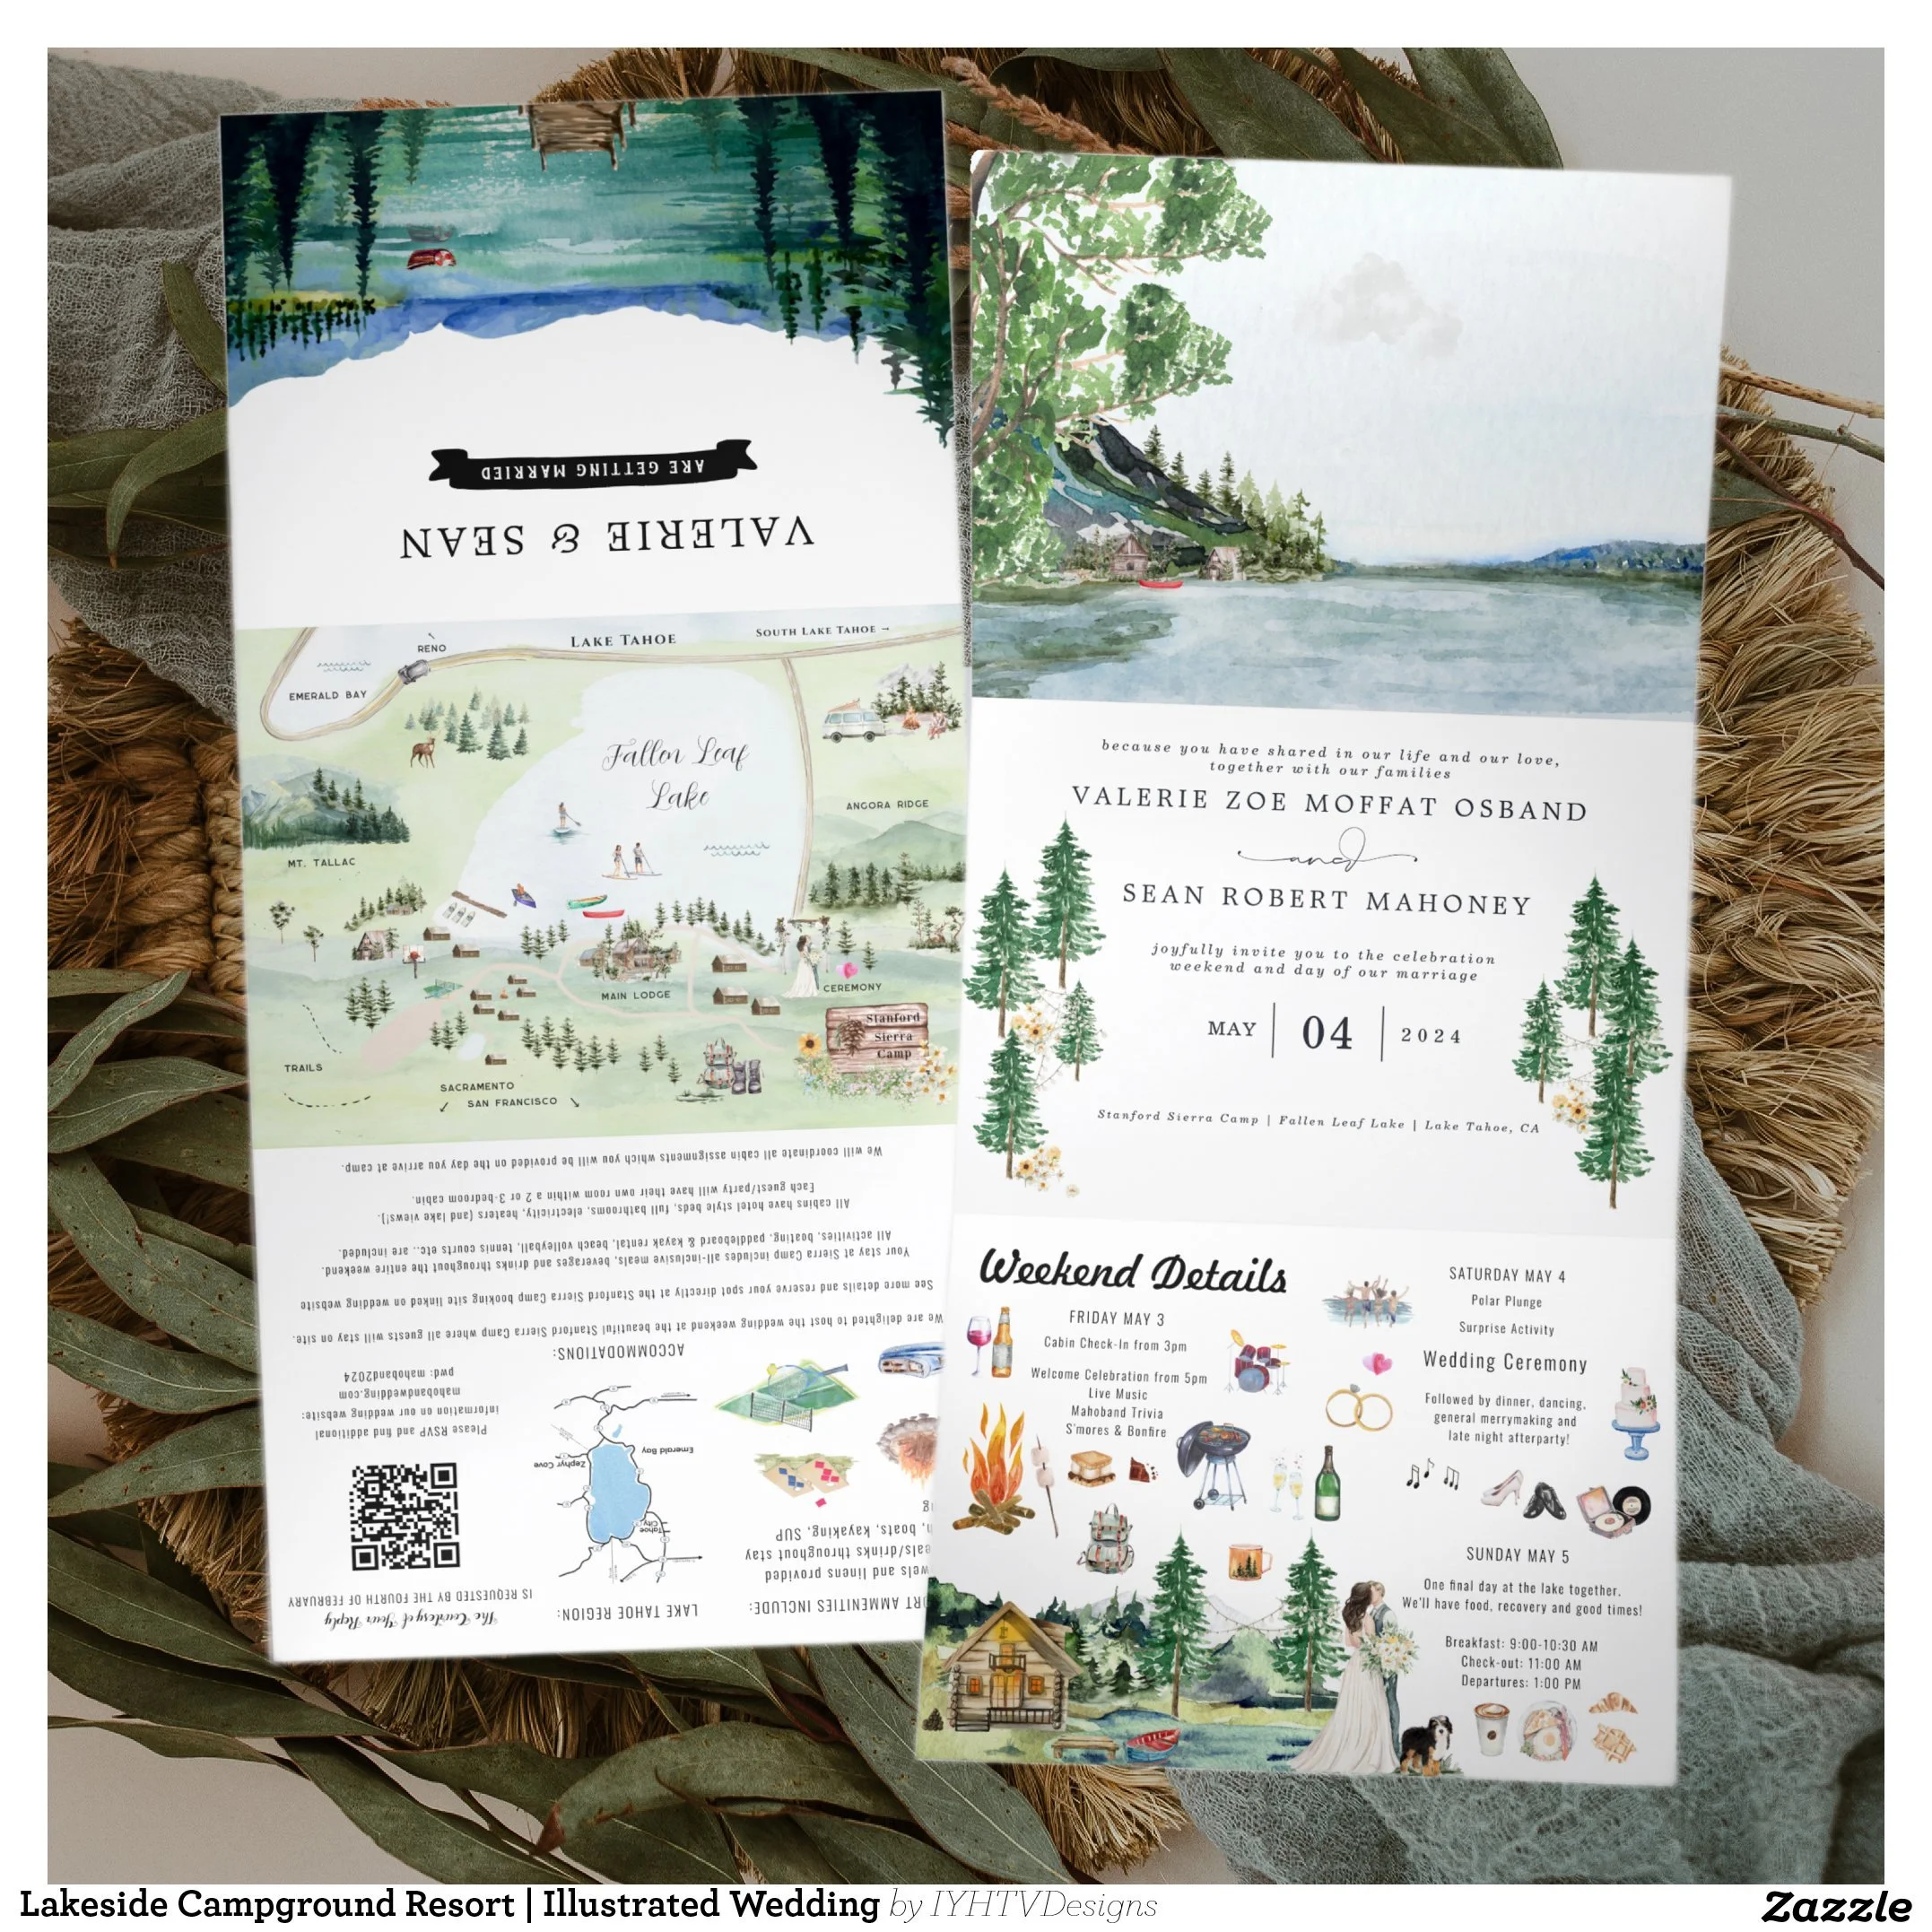
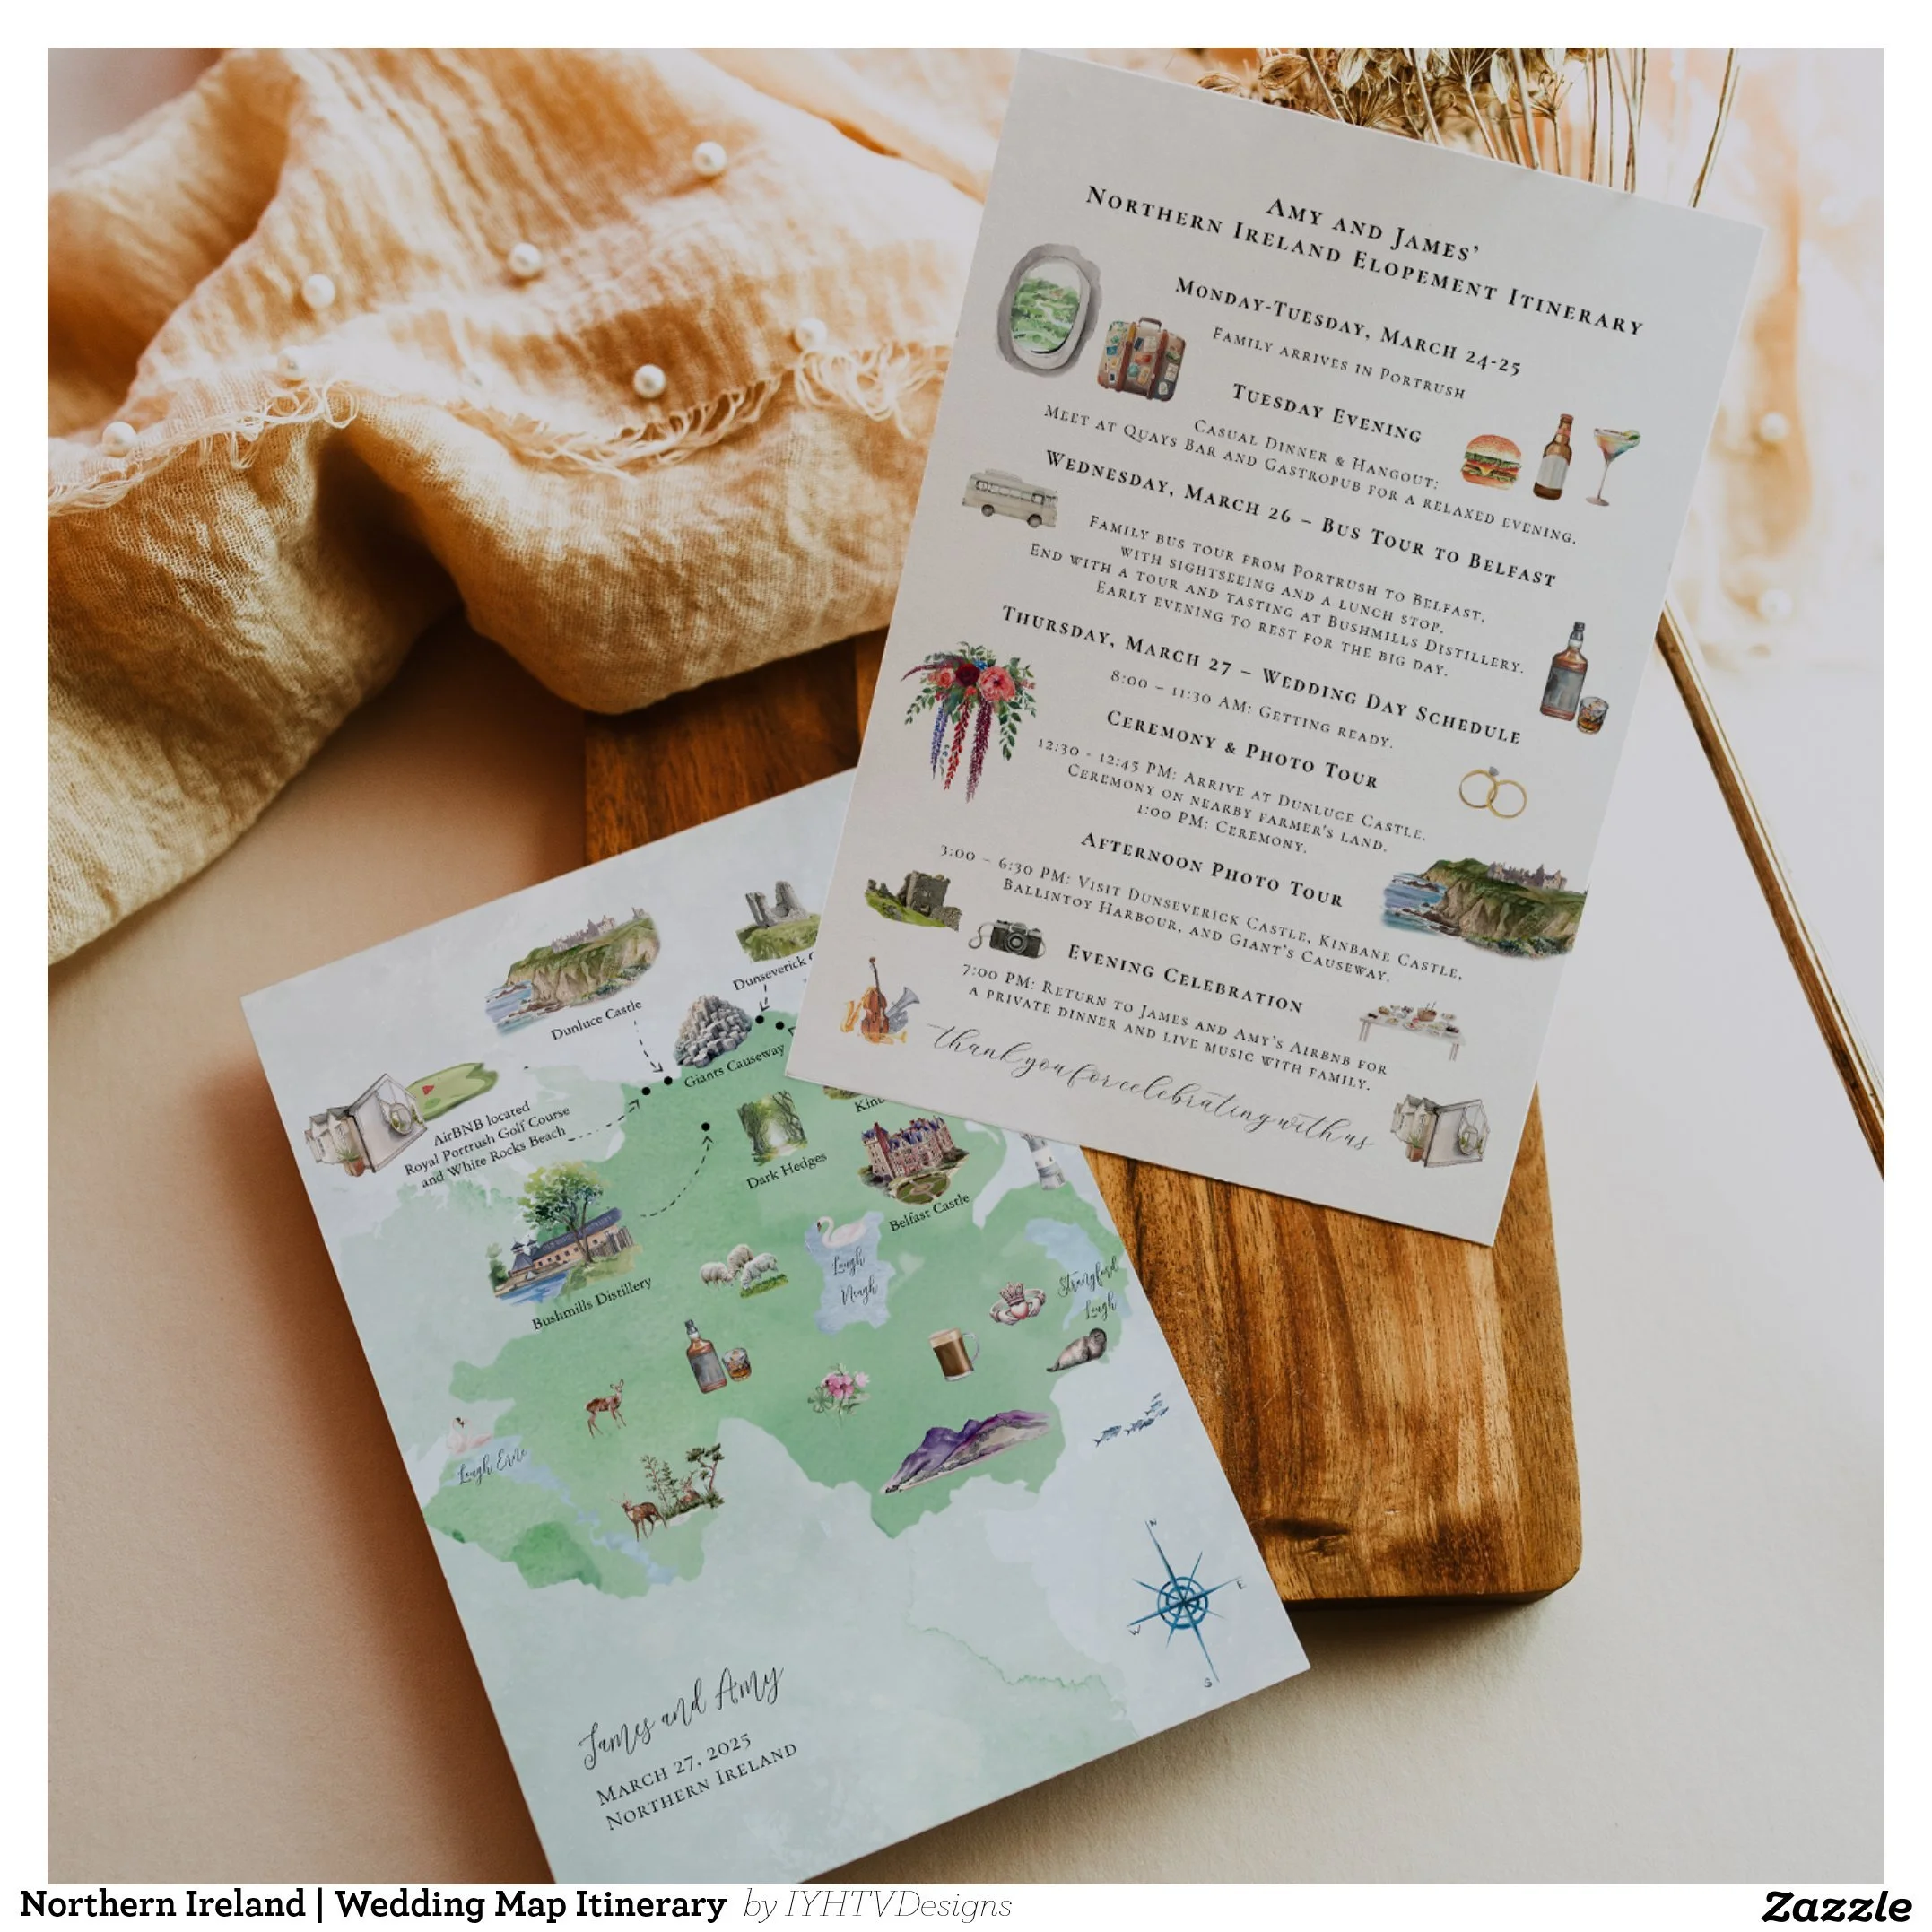
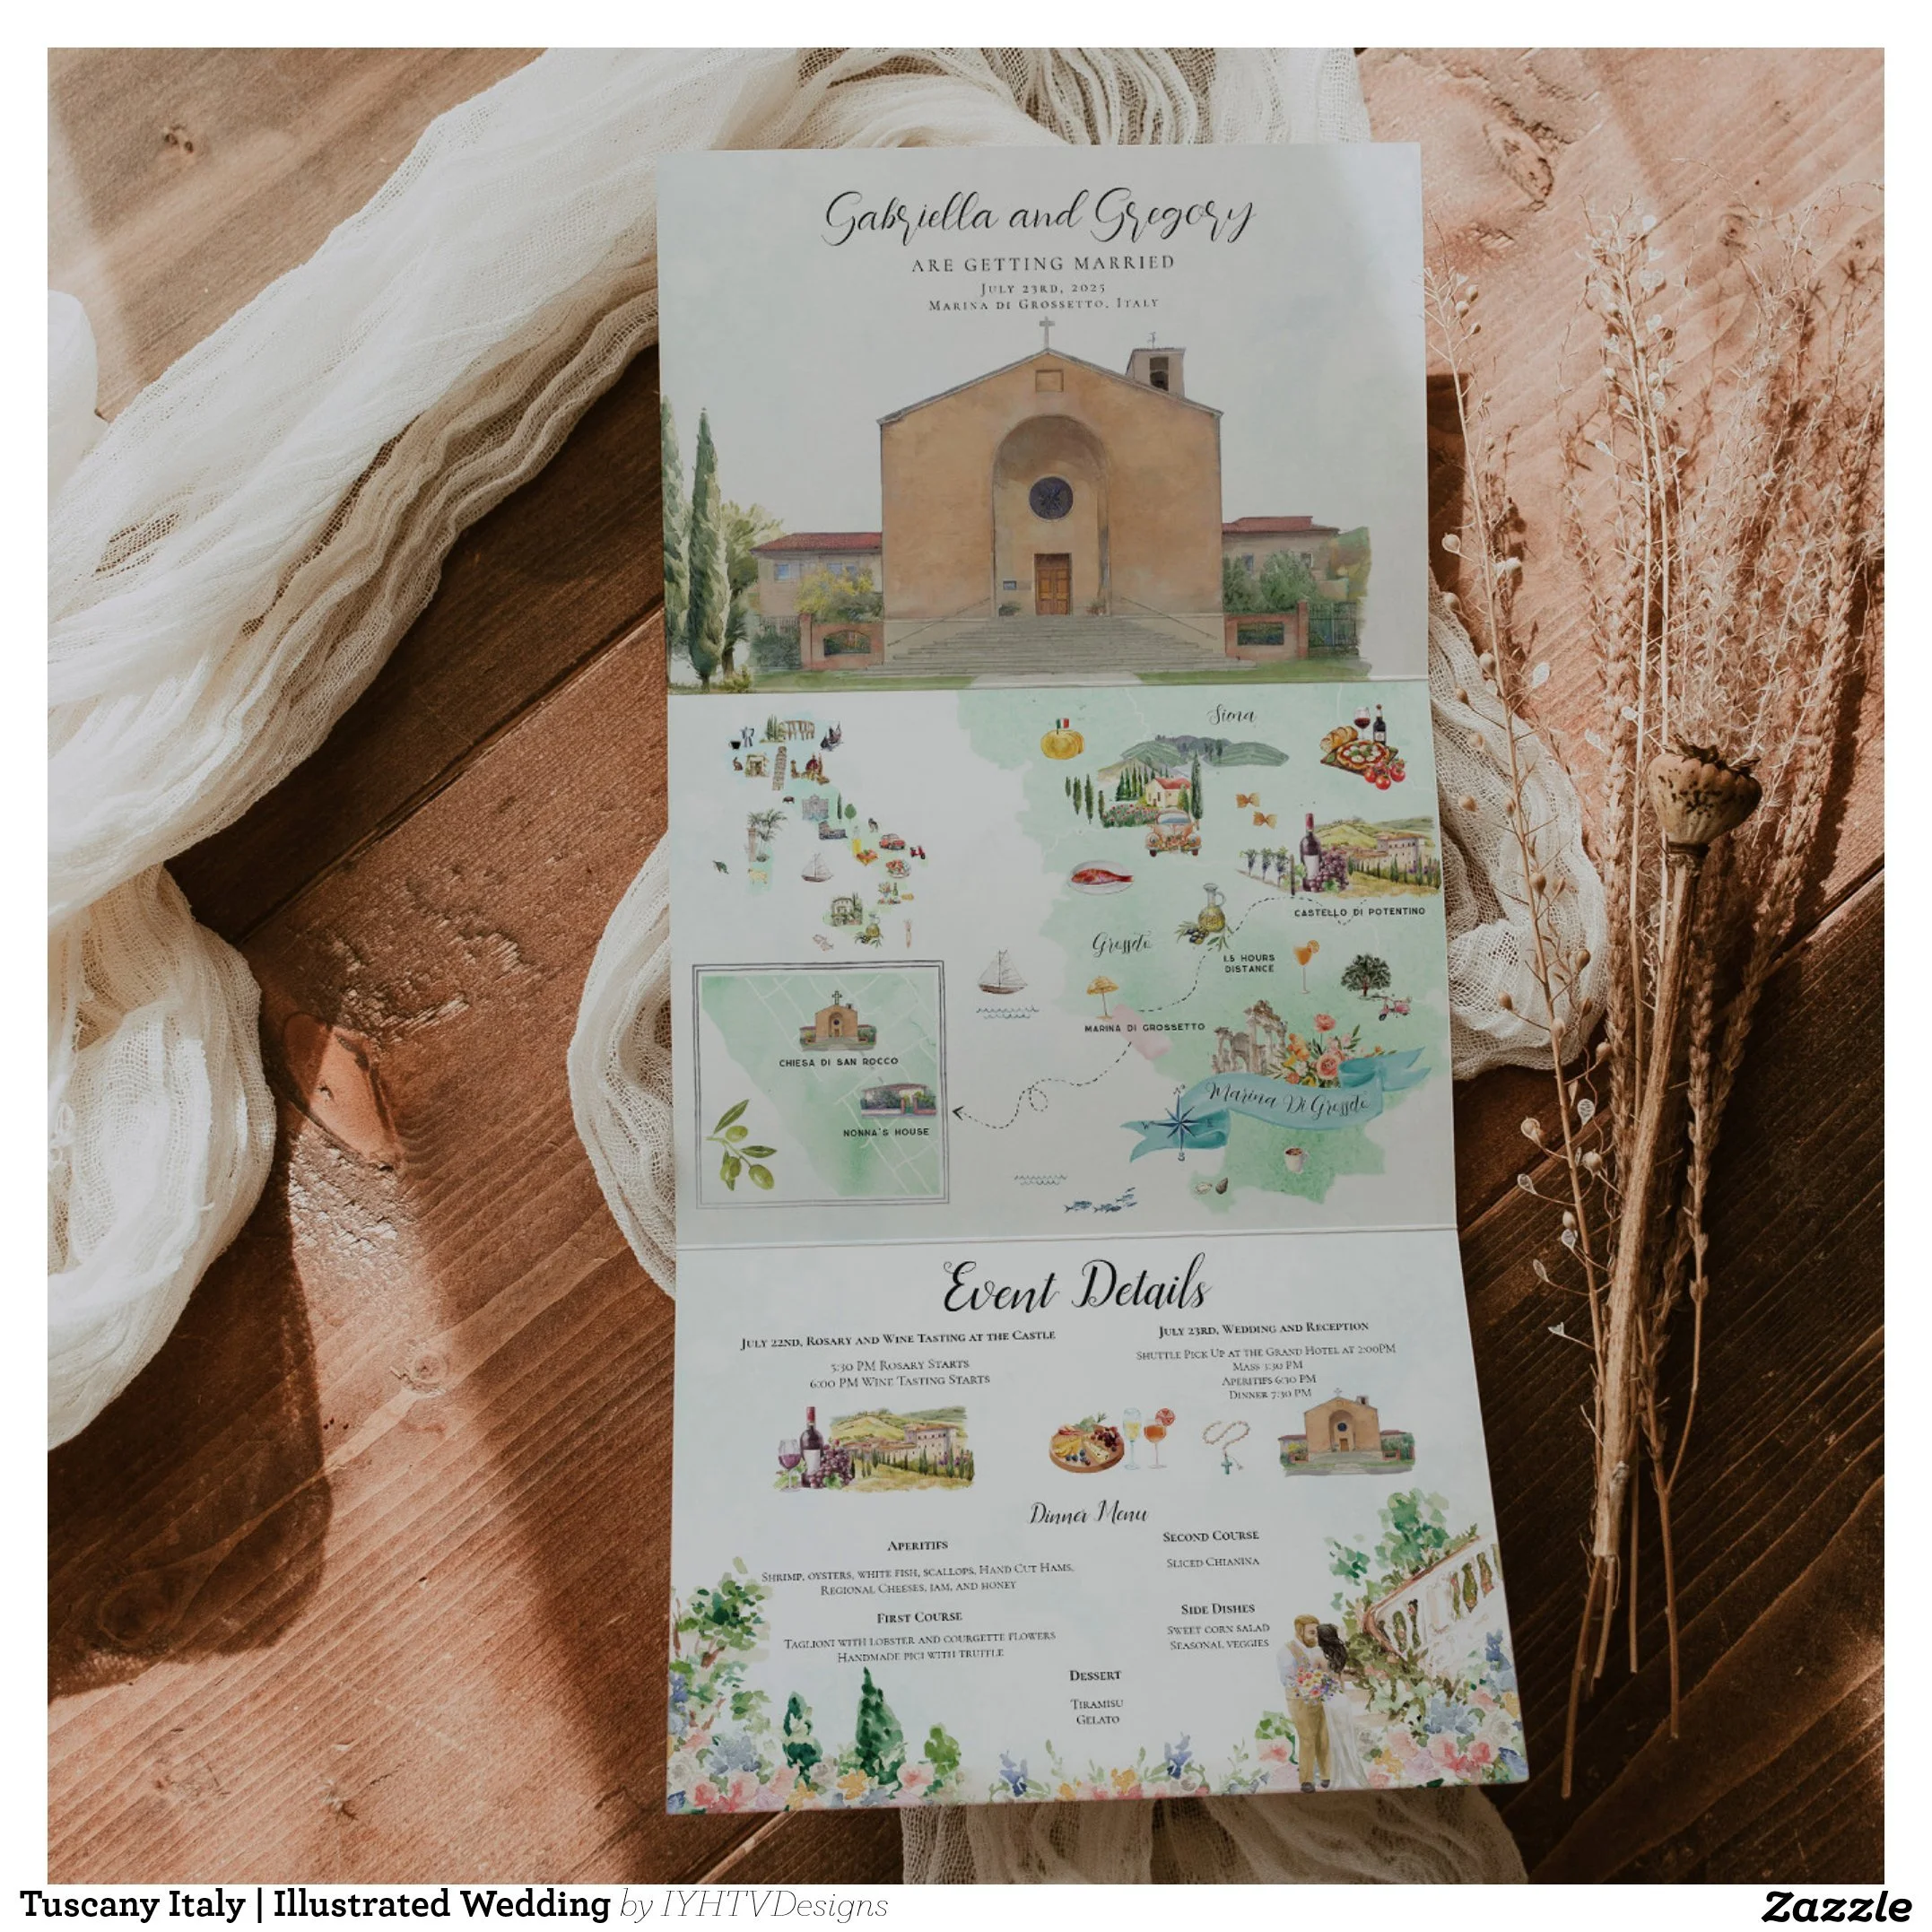
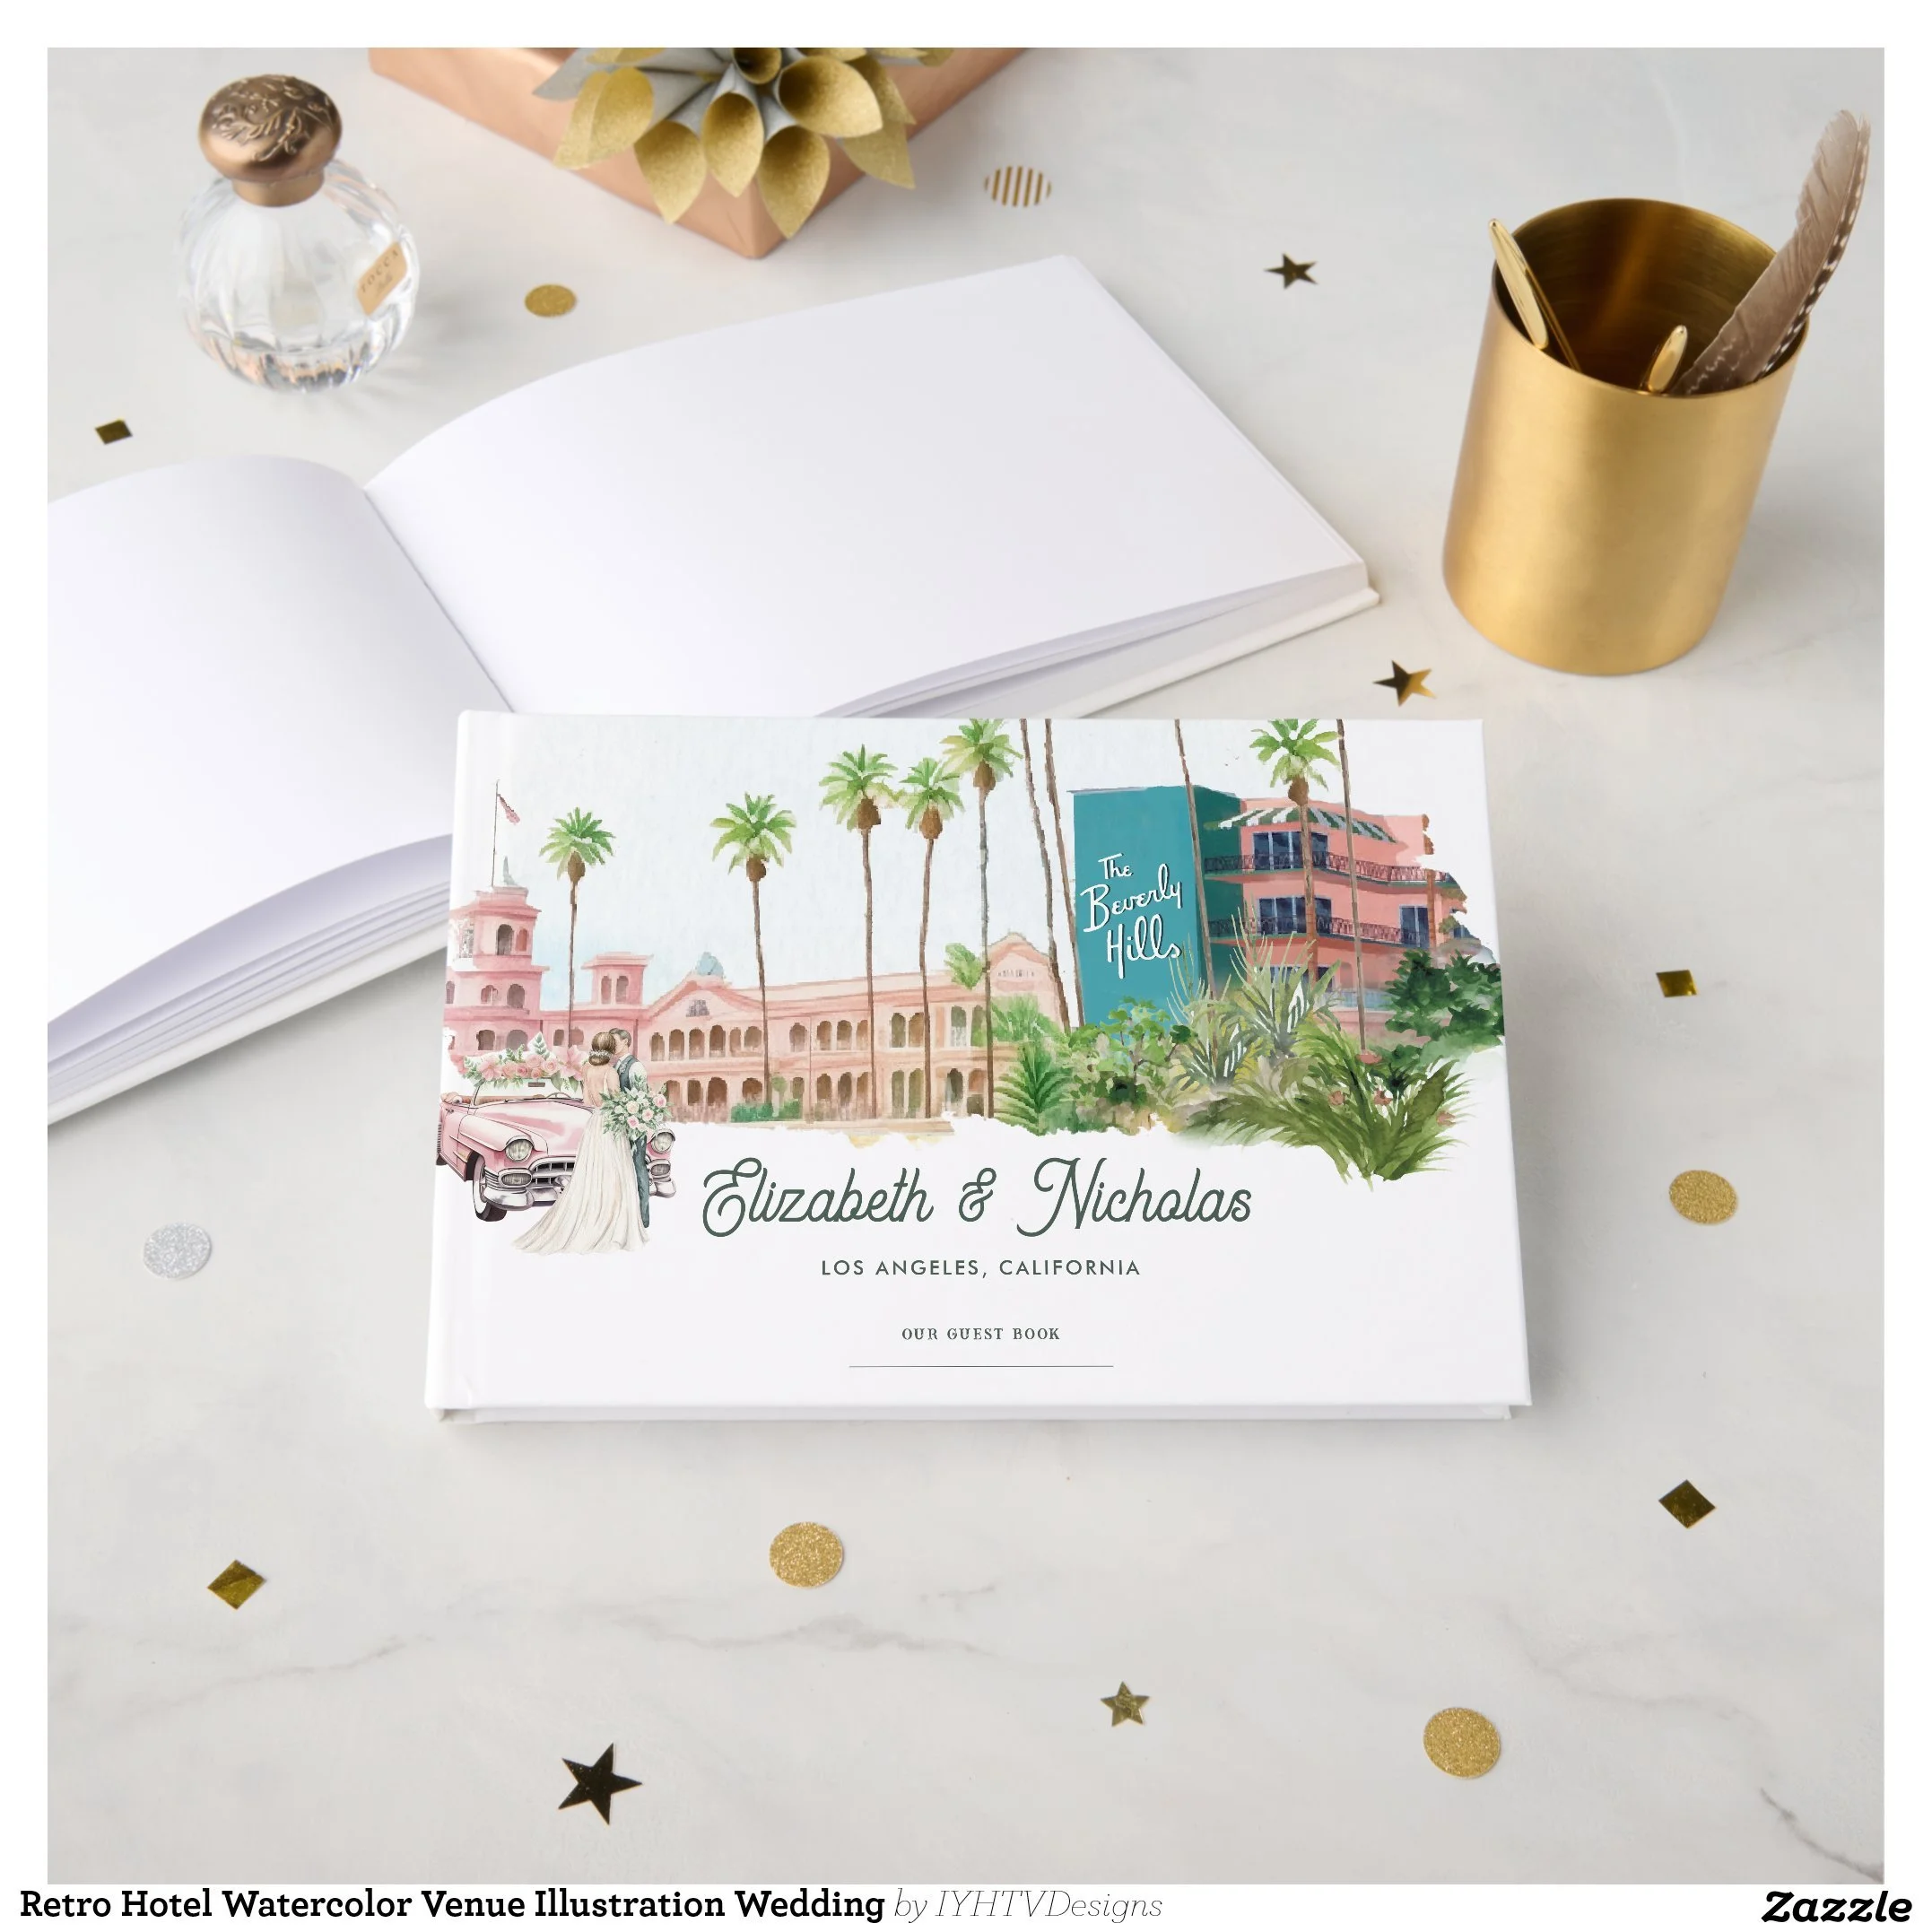
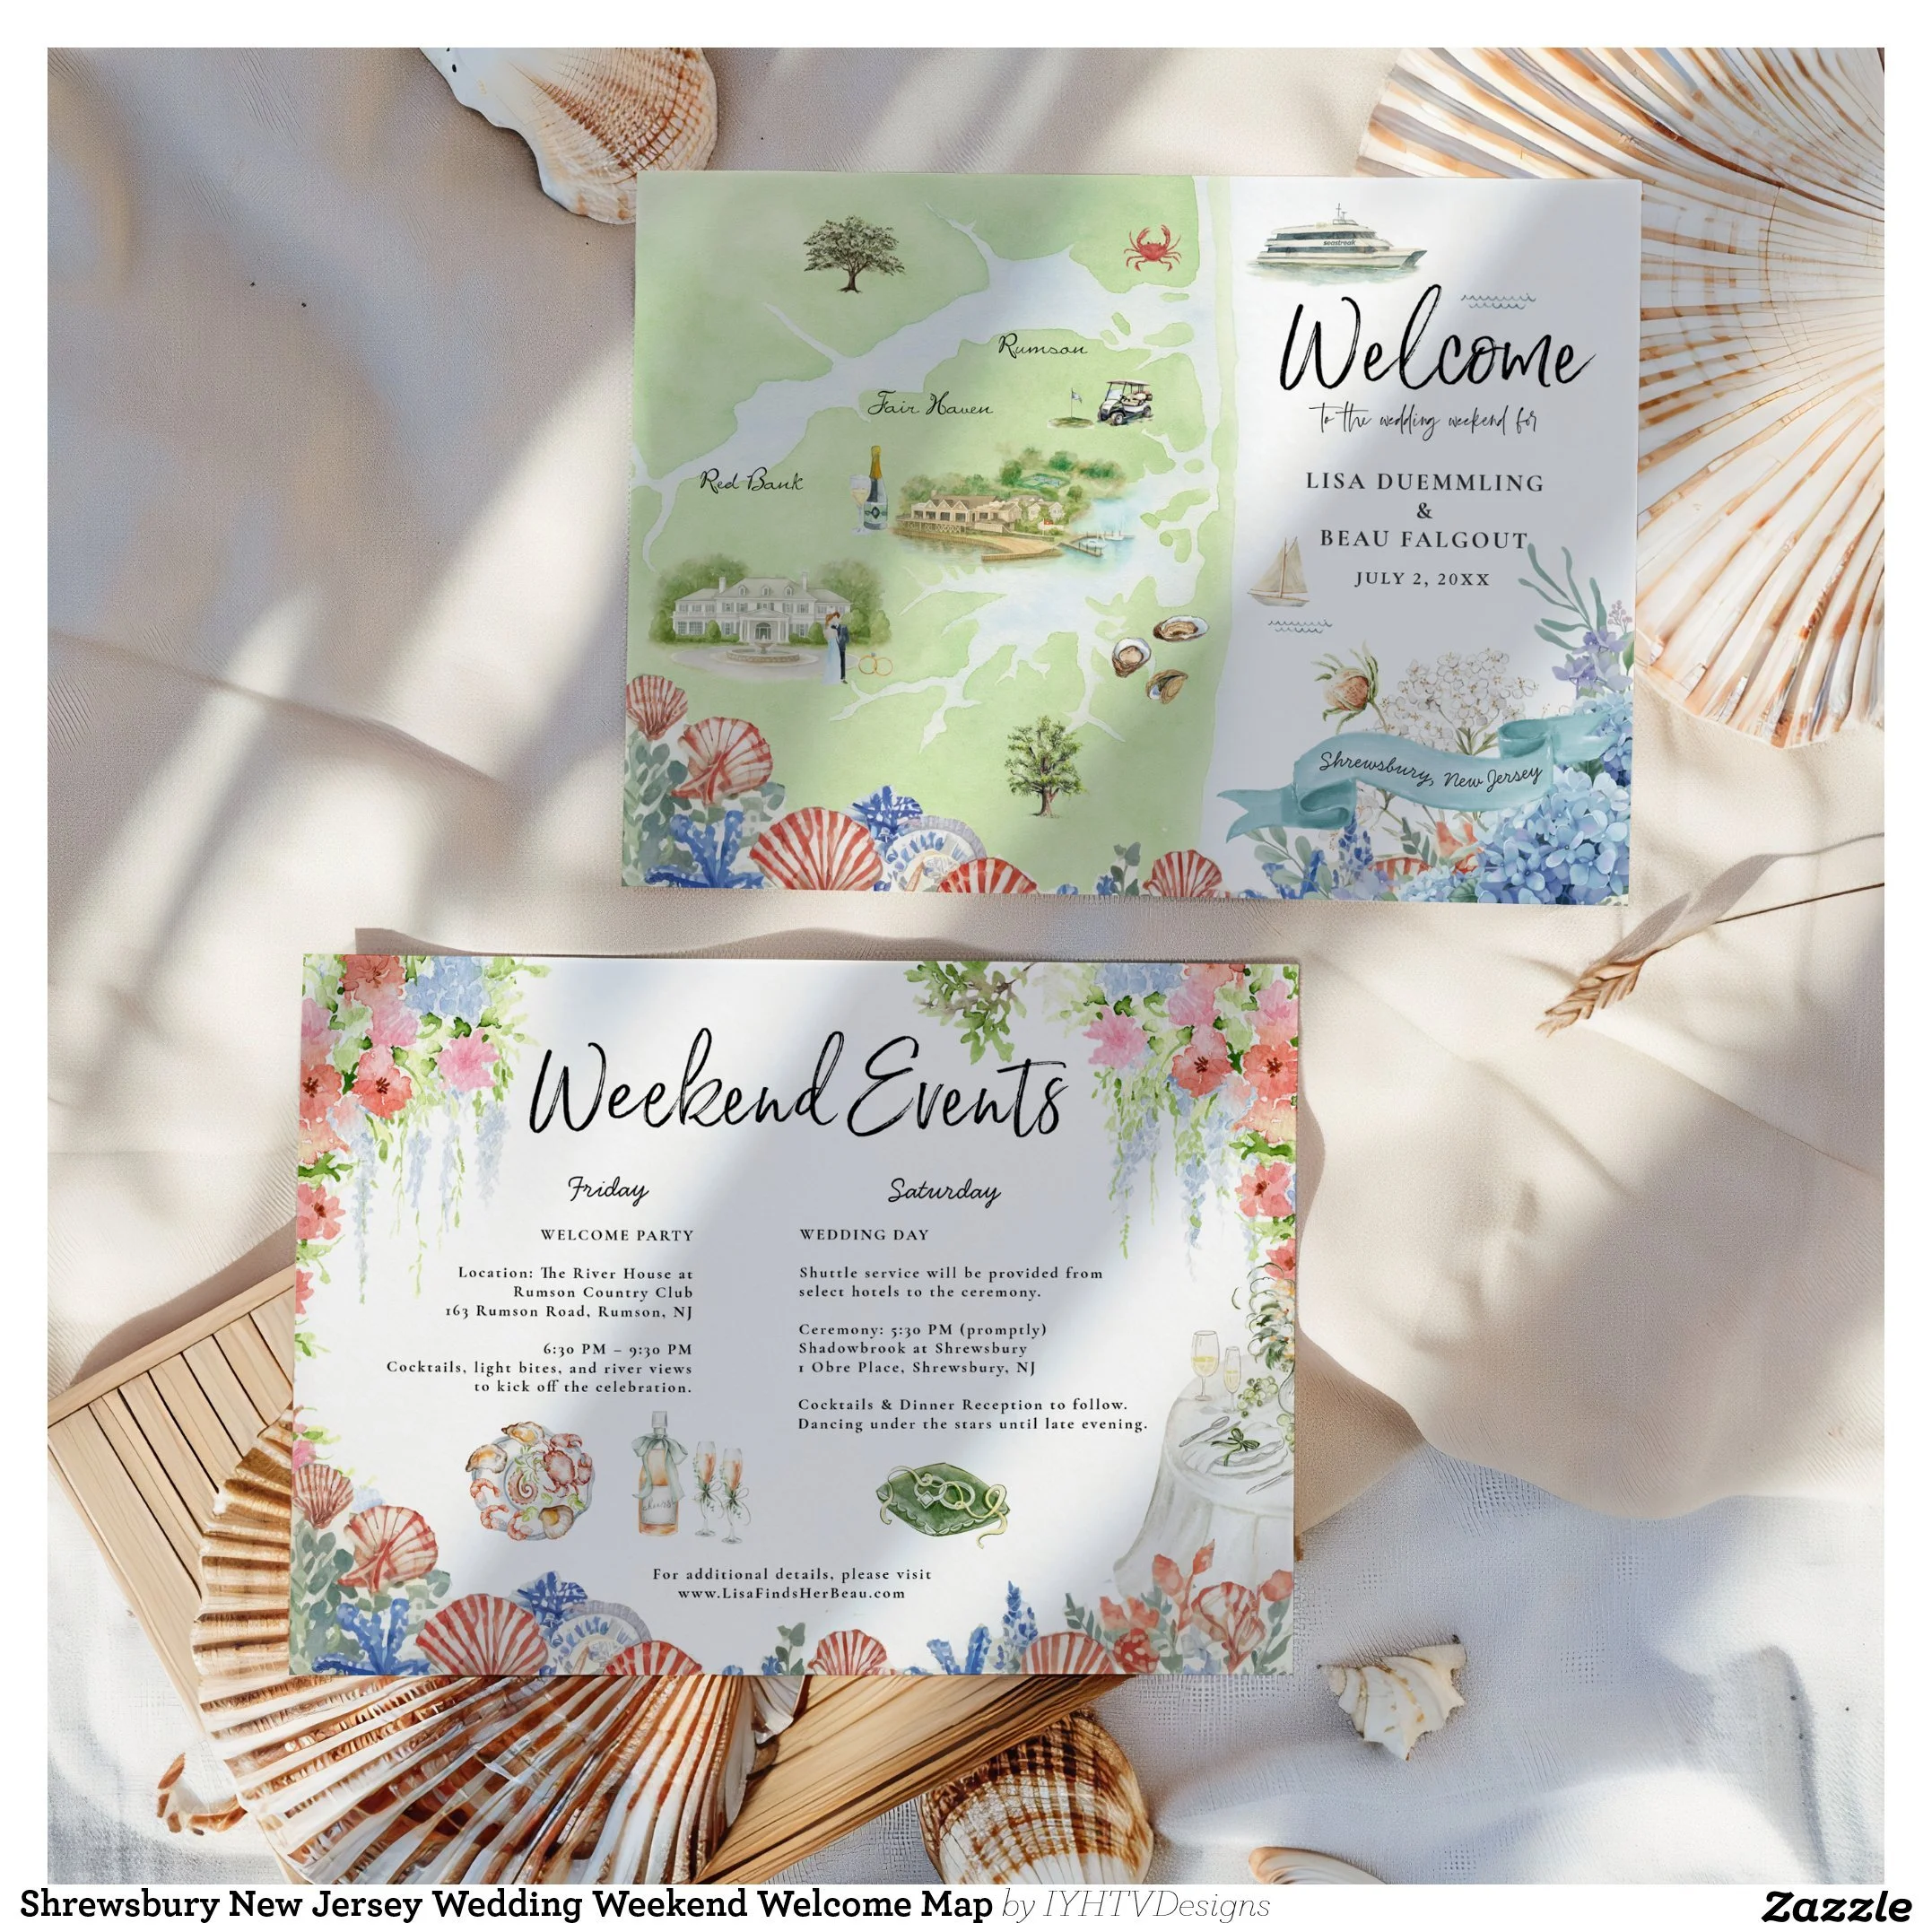
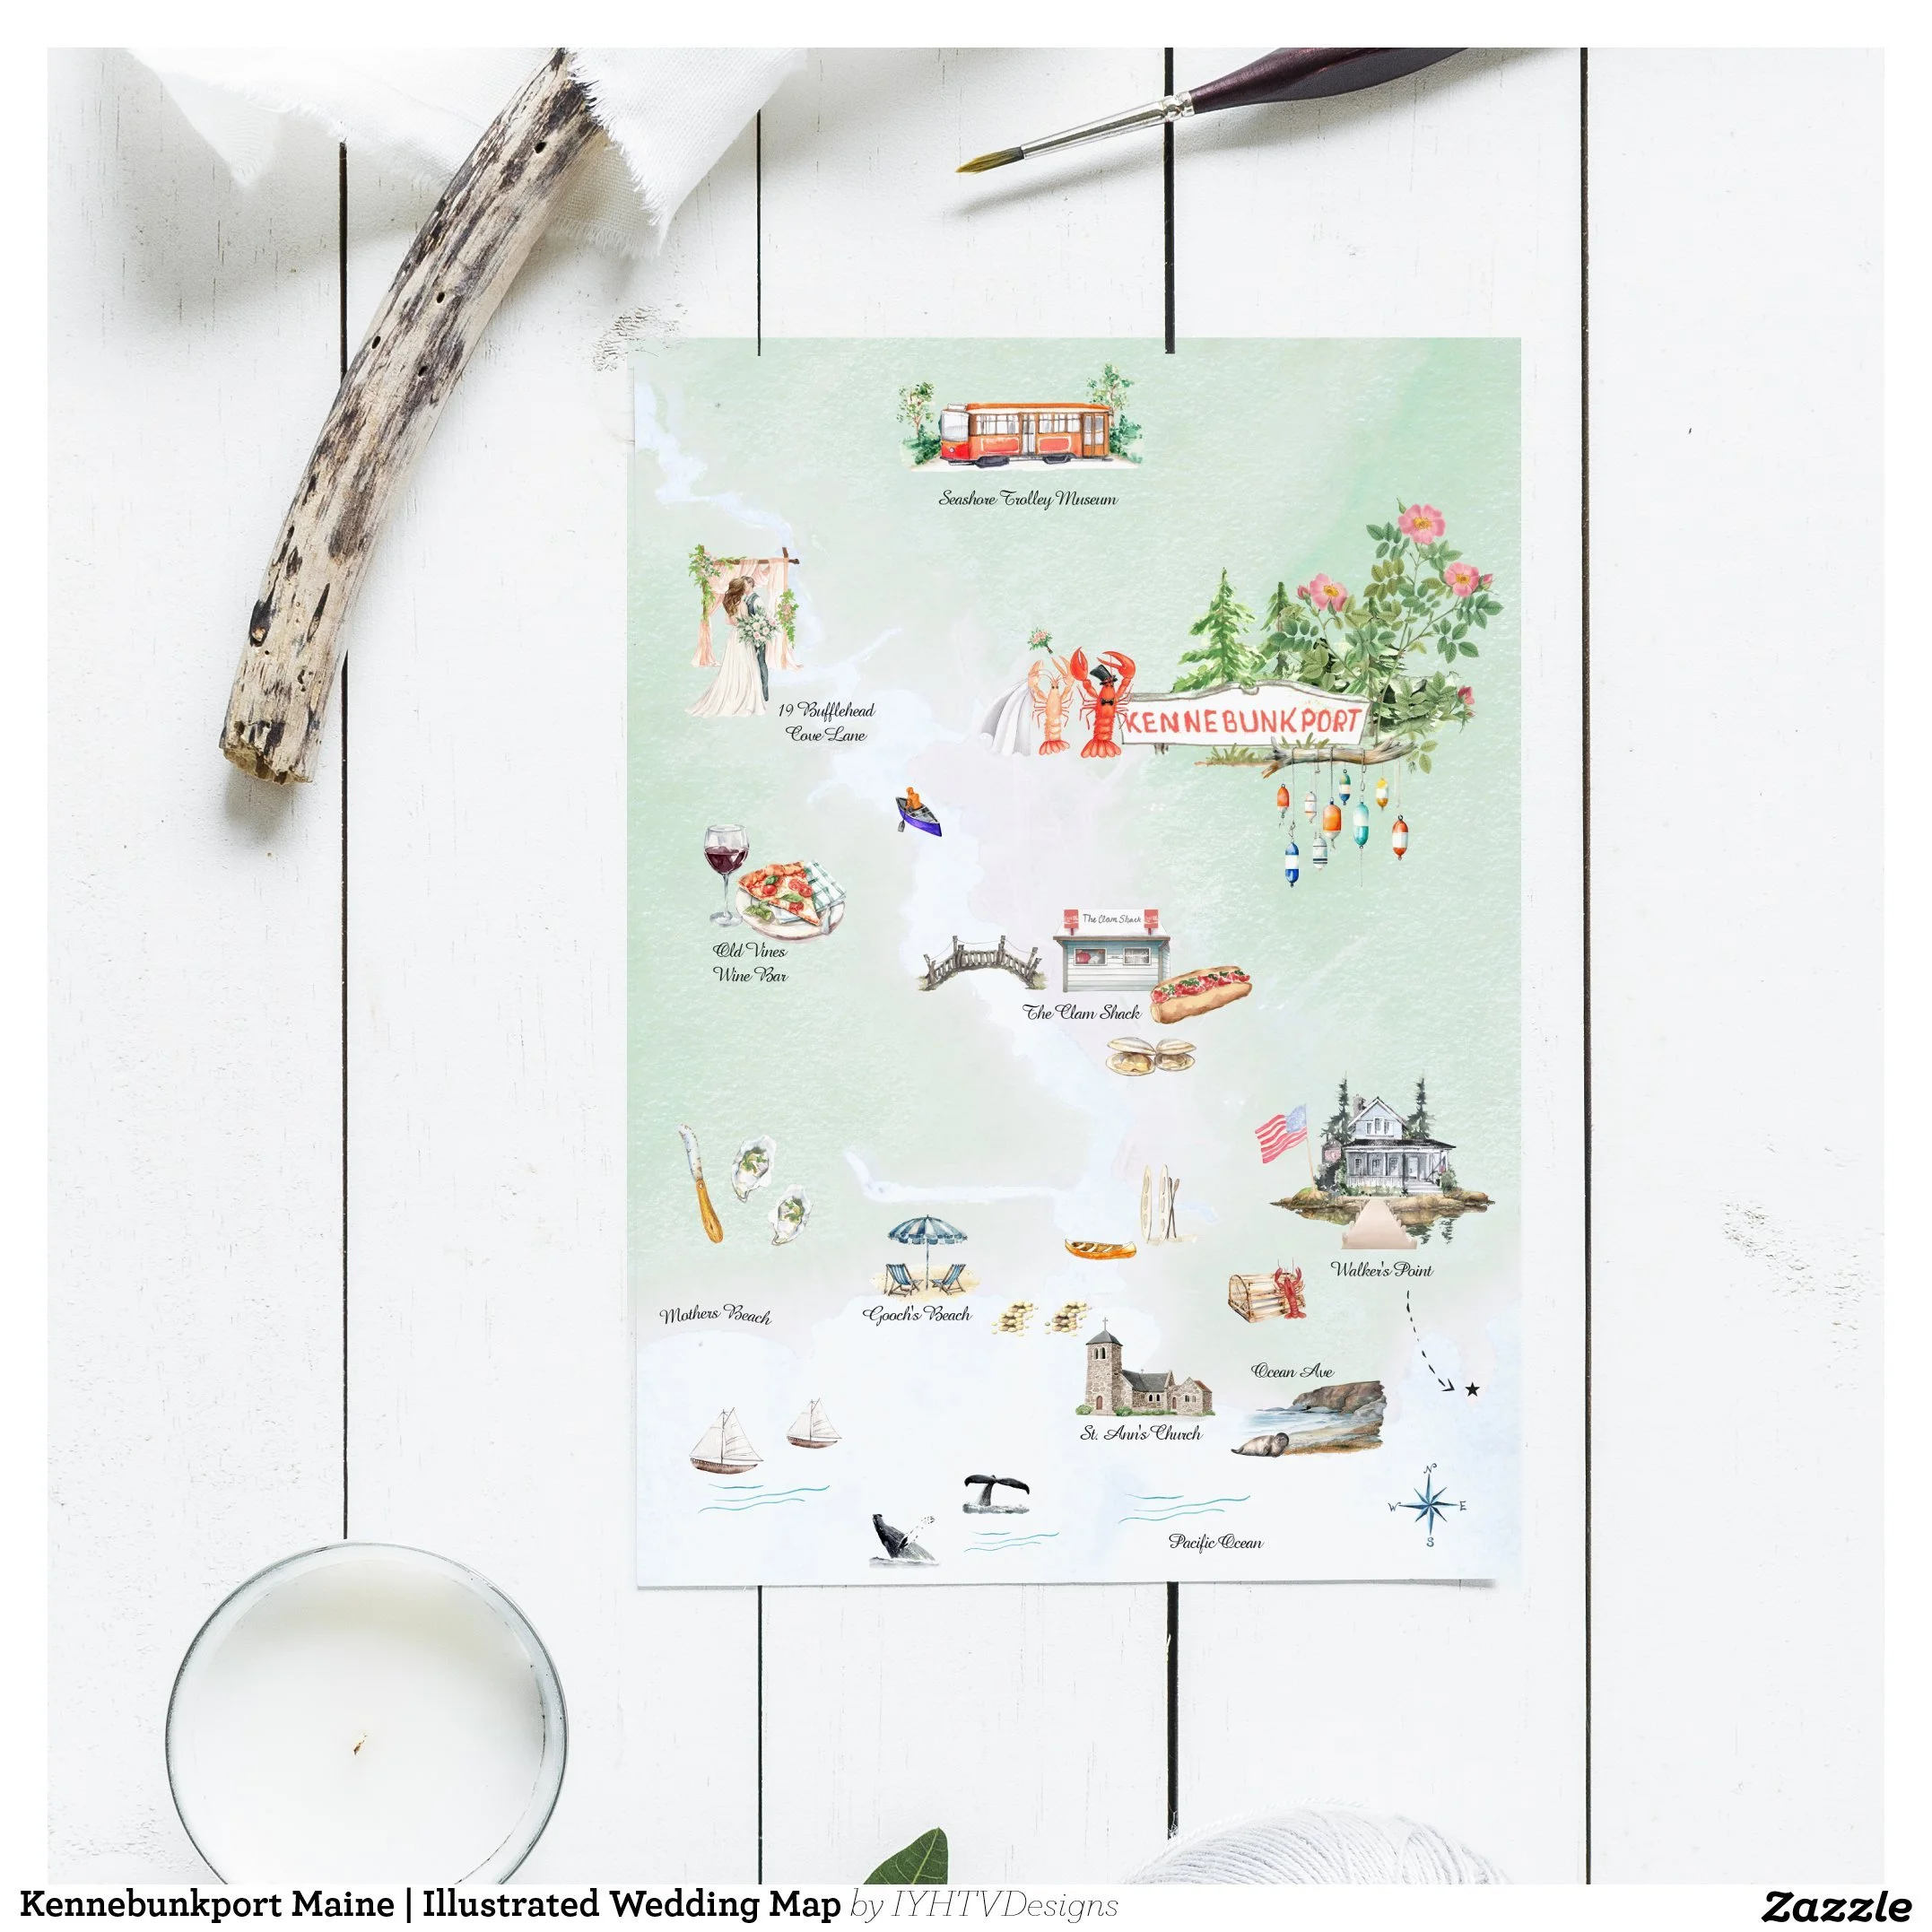
Over the years, I have designed illustrated wedding maps and destination invitations for couples all over the world. From Italy and Hawaii to Mexico, New Orleans, and small hometown celebrations, each piece is completely custom and built around the couple’s journey.
Here is a behind-the-scenes look at how I turn your love story into a hand-painted keepsake.
Step 1: Learning Your Story
Before I ever pick up a brush, I take time to understand you.
I learn about:
Where you met
Where you grew up
Where you fell in love
Why you chose your venue
How your wedding weekend will flow
Some couples want a map that highlights their relationship journey. Others want a detailed destination guide for guests. Many want both.
This first step is about listening. Every design begins with your story, not a template.
Step 2: Researching Your Location
Once I understand your vision, I dive into research.
I study:
Venue architecture
Surrounding landscapes
Street layouts
Landmarks
Natural features
Cultural details
Whether your wedding is in Tuscany, Maui, San Miguel de Allende, or a hometown you love, I make sure the illustration feels true to that place.
This is what gives each map its sense of authenticity.
Over the years, I’ve created hundreds of hand-painted watercolor maps featuring countries, regions, and destinations around the world. Many of these travel-inspired pieces inform my custom wedding designs. You can explore my full Watercolor Art Maps collection here, which showcases illustrated maps from Mexico and Central America to Europe and beyond.
Step 3: Planning the Layout and Flow
Before painting in Procreate begins, we collaborate the desired the structure.
This includes:
Panel layout (for tri-folds or multi-page sets)
Reading order
Visual balance
Spacing for text
Guest-friendly navigation
A wedding map needs to be beautiful and functional.
Guests should be able to glance at it and immediately understand where they are going and what is happening.
This planning stage ensures the final piece works in real life, not just in photos.
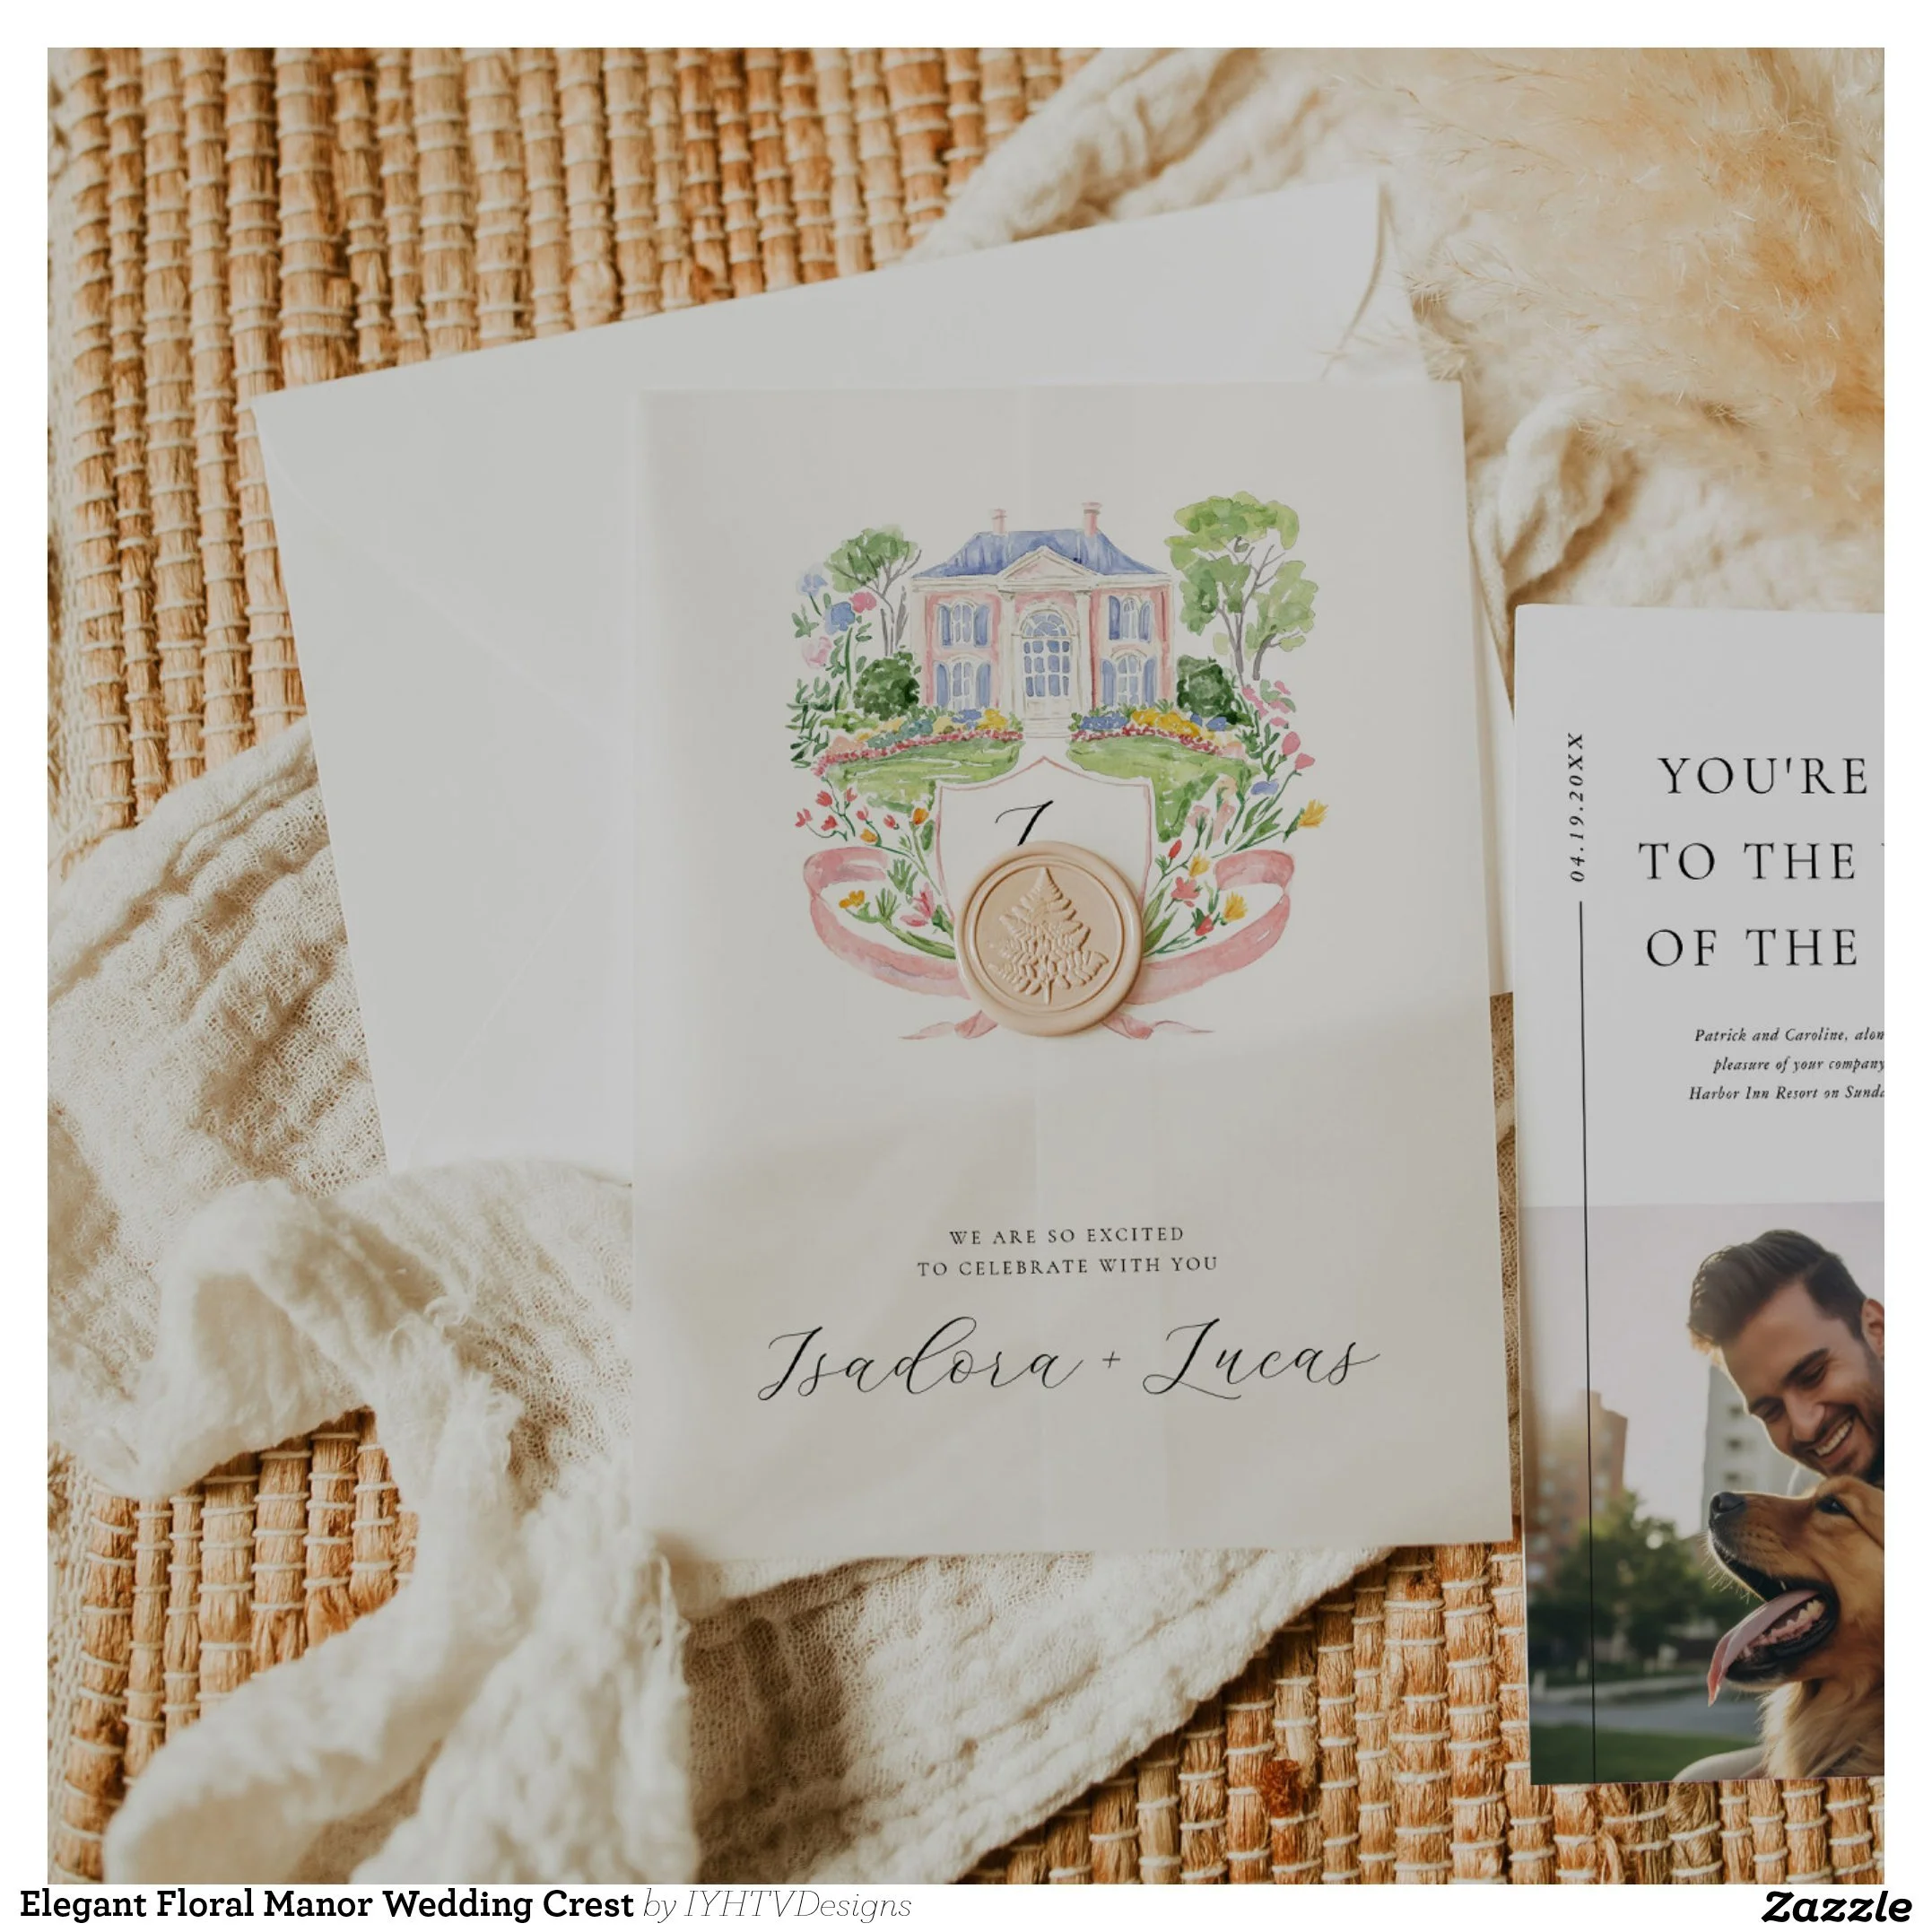
Step 4: Hand-Painted Watercolor Illustration
This is where the magic happens.
Each illustration is created in my signature watercolor style, using soft layering, detailed brushwork, and carefully balanced color palettes.
I focus on:
Light and depth
Natural textures
Architectural detail
Botanical elements
Atmosphere
My goal is always to make the piece feel timeless. Something you will still love when you look at it years from now.
Not trendy. Not generic. Truly yours.
Step 5: Typography and Digital Refinement
Once the artwork is complete, I move into digital refinement.
This includes:
Professional typography
Spacing and alignment
Print optimization
Color correction
High-resolution export
This step ensures your invitations look just as beautiful when printed as they do on screen.
It is where artistry meets professional design.
Step 6: Collaboration and Revisions
Custom design is a collaboration.
You will always have the opportunity to review your design and request thoughtful adjustments.
This might include:
Wording changes
Timeline updates
Color tweaks
Detail refinements
Layout adjustments
I build flexibility into every project so your final piece feels exactly right.
My goal is never to rush you. It is to create something you feel proud to send to the people you love.

Step 7: Final Delivery and Keepsake Value
When your design is complete, you receive either high-resolution files ready for printing and sharing, or your custom link to print through Zazzle.
Many couples later:
Frame their maps
Include them in albums
Display them at home
Pass them down as keepsakes
What begins as an invitation becomes part of your family story.
Frequently Asked Questions
How long does a custom wedding map take?
Most projects take several weeks from start to finish, depending on complexity and timing. I always recommend reaching out early when possible.
Can you illustrate any location?
Yes. I regularly work with international and destination weddings, as well as hometown venues.
Is every design fully custom?
Yes. I do not use templates. Each map is built from scratch for your wedding.
Can wording be changed later?
Absolutely. Wording changes are part of the collaborative process.
Do you work with last-minute timelines?
Sometimes, depending on availability. It is always best to ask.
What if our plans change?
I understand that weddings evolve. I build flexibility into the design process whenever possible.
Why Couples Choose Custom Watercolor Maps
A custom wedding map is more than stationery.
It is:
A guide for your guests
A reflection of your journey
A piece of art
A lasting keepsake
It tells your story in a way nothing else can.
Ready to Create Yours?
If you are dreaming of a meaningful, custom watercolor map for your wedding weekend, I would love to hear your story.
You can explore my portfolio and reach out to begin your custom design journey.
Every map begins with a conversation.
And I cannot wait to start yours.
About the Artist
I’m Laura-Lise, founder of IYHTVDesigns, specializing in custom watercolor wedding maps and destination invitations for couples worldwide.